Learning how to paint lilac in watercolour may seem complicated, but it’s actually much easier than it looks.
This is especially true when you simplify the flower and render it in a loose watercolour style.
That means you focus on illustrating the flower without worrying about all the little details. This approach is excellent for beginners.
So, this tutorial will help you achieve your goal by focusing on:
- The overall shape of the flower.
- The pigments you’ll use in your painting.
- How to apply the wet-on-dry technique.
Once you understand these fundamentals, you’ll be able to paint watercolour lilac with effortless grace.
Without further ado, let’s dive into the tutorial!
DISCLOSURE: This page contains affiliate links. If you make a qualified purchase using any of the links, I’ll earn a small commission at no extra cost to you. I appreciate every sale because it allows me to create free content to promote the growth of this website.
Table of Contents
Materials You Will Need
Before you begin, make sure you have these essential watercolour supplies:
- Watercolour paints (I’m using White Nights Watercolour Paints)
- Watercolour brushes (I’m using Silver Black Velvet Brushes)
- Watercolour paper (I’m using Arches Cold-Pressed Paper)
- Mixing palette (I’m using Meeden Porcelain Mixing Palette)
- Masking tape (I’m using Pro Artist Tape)
- 2 jars of clear water
- A cloth or some tissues (optional)
When you’re ready, proceed to the next section.
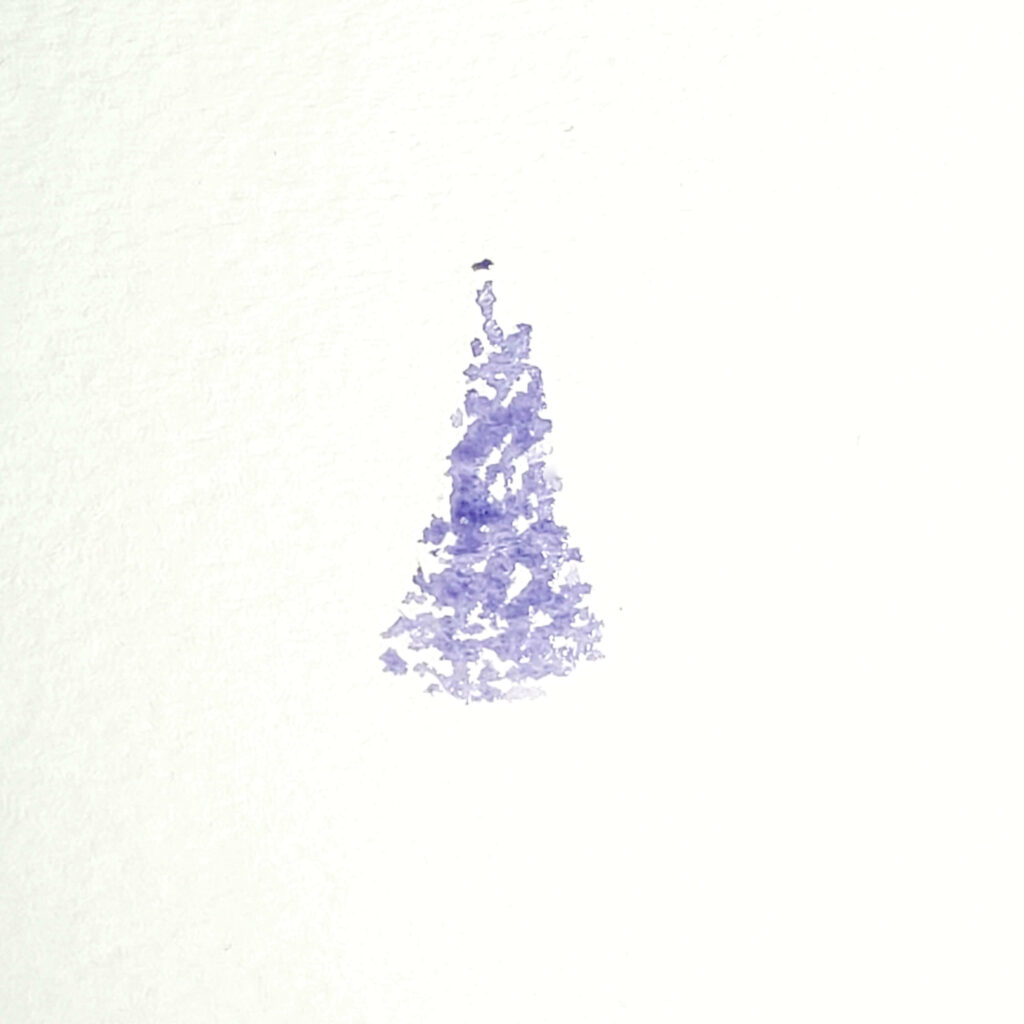
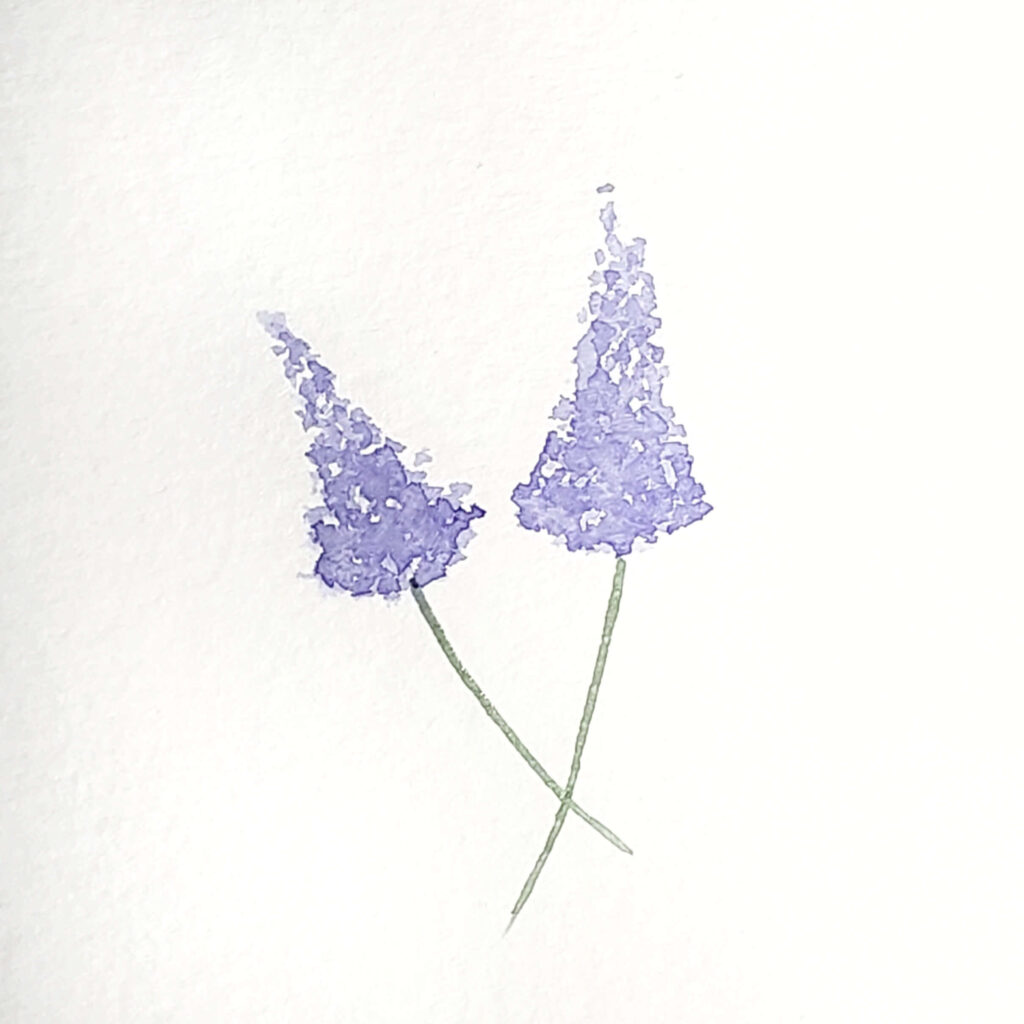
Step 1: Paint the First Lilac
- Dilute purple or lilac pigment in your mixing well. If you don’t own either of these colors, mix blue and red pigment to create purple.
- Take your paintbrush and load it up with the watery pigment. Start at the top of the lilac where the tip is narrowest and use small stipples of paint to create the flowers. As you work your way down, make sure the tiny dabs of paint become more numerous in order to create a long triangular shape.
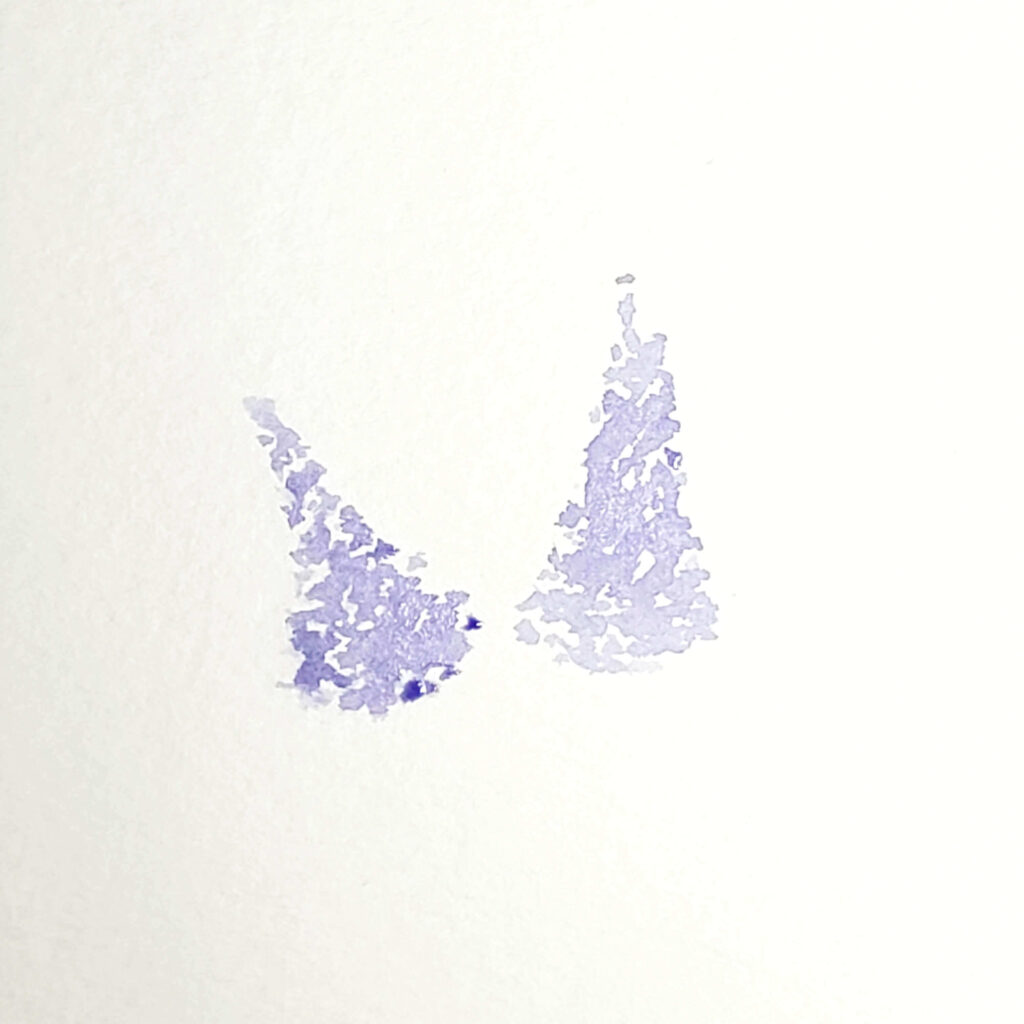
Step 2: Paint the Second Lilac
- After the first lilac is painted, repeat step two once again by painting a second lilac beside the first. Tilt this lilac to the side so that it shows flow and movement.
- Wait for the layer to dry.
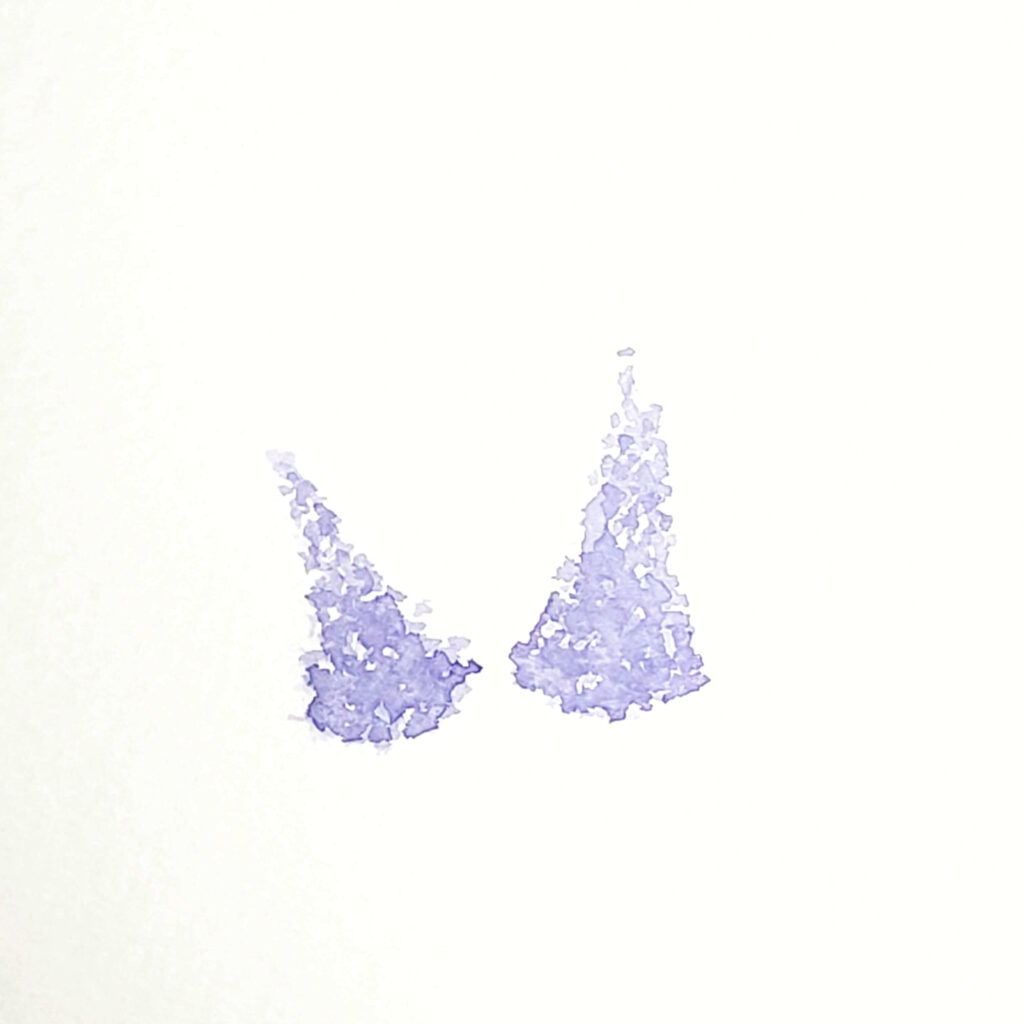
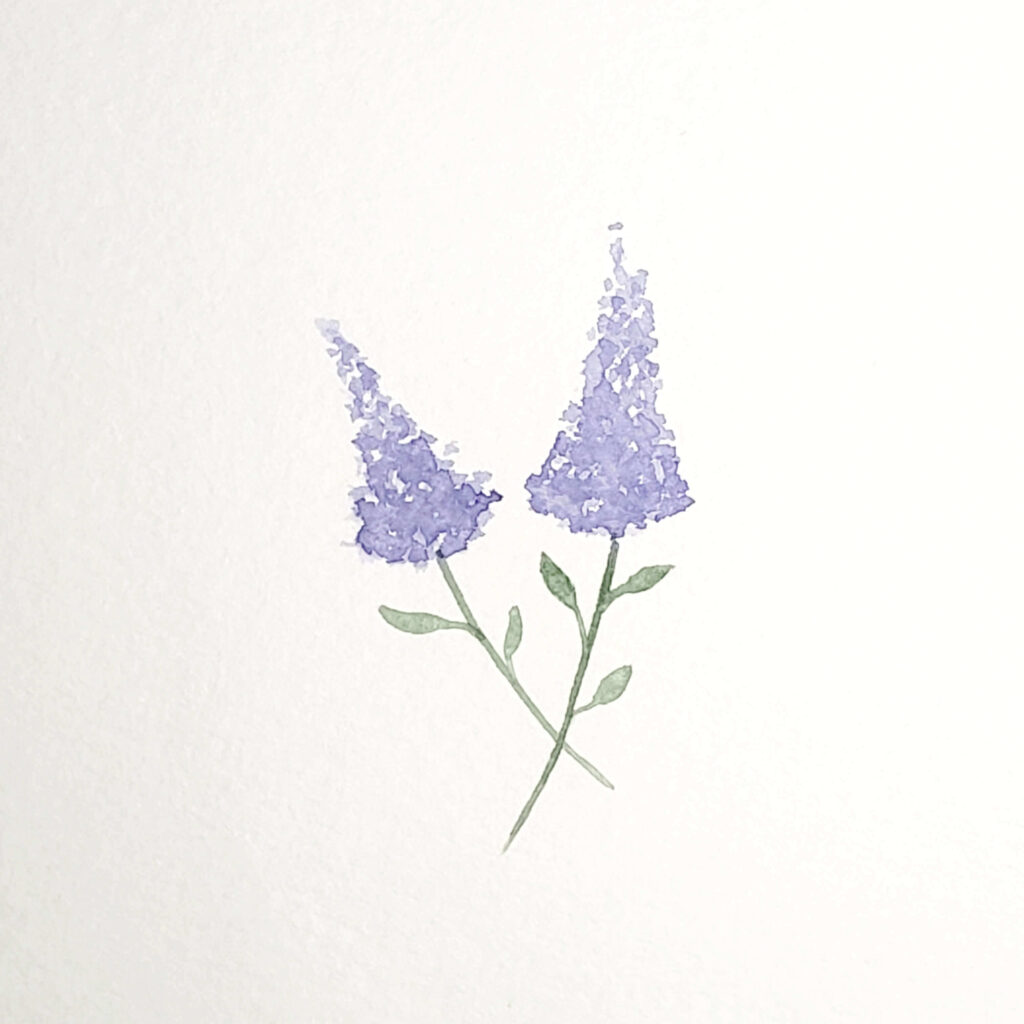
Step 3: Darken the Lilacs
- Next, fill your brush up with more pigment. This time, make sure it’s a little less watery. Dab this slightly darker pigment around the base of the lilac. Add a few more dabs of pigment in the middle section but avoid adding more pigment to the top.
- Wait for the layer to dry.
Step 4: Paint the Stems
- Rinse off your brush in one of the water jars (the one that contains the dirty water) and then dilute some green pigment in the mixing well. Load up your brush and then paint a single thin line starting at the base of the lilac. Cross the stems over one another.
Step 5: Paint the Leaves
- After you’ve painted the stems, apply gentle pressure on your paintbrush to create a few small leaves. Use gentle C shapes to create the curves of each leaf.
- Wait for the layer to dry.
Next Steps: Create More Flowers
Now that you’ve learned how to paint lilac in watercolour, you’re likely eager to continue creating more floral artwork.
But to enhance your watercolour florals, you’re going to need to learn how to learn how to master the paint-to-water ratio and several others techniques, too.
Fortunately for you, the Foxsy Watercolor Academy teaches you all the essential watercolour basics and techniques that’ll set your paintings up for success.

The Academy is a holistic resource that helps beginners build a solid foundation in watercolour painting by giving them the step-by-step roadmap to success.
To take advantage exciting opportunity by enrolling in the Academy today, click the image.
This article originally appeared on Foxsy.

Miranda Balogh
Artist & Online Educator


Leave a Reply