Watercolour is a lot of fun. But it can also be time-consuming and difficult at times.
So, wouldn’t it be awesome if you knew about watercolour hacks that could save time and make your painting process easier?
That’s why, in this article, I’m sharing 15 genius watercolour art hacks with you so that you can:
- Learn how to use advanced watercolour techniques to create more visual interest in your artwork
- Apply interesting painting hacks that will simplify or speed up your painting process
- Experiment with low-cost supplies that will have a huge positive impact on the way you make art
By the time you’re done reading, you’ll know of 15 different strategies that will reveal how you can hack watercolour.
DISCLOSURE: This page contains affiliate links. If you make a qualified purchase using any of the links, I’ll earn a small commission at no extra cost to you. I appreciate every sale because it allows me to create free content to promote the growth of this website.
Table of Contents
1. Is It Possible to Erase Watercolour? Yes!
Did you know that it’s possible to erase watercolour after the pigment has already dried?
Yes, it’s true!
All you have to do is buy a cheap Mr. Clean Magic Eraser. Cut off a small piece of the eraser and wet it a little bit.
Then, using one of the edges, gently rub the eraser against the watercolour pigment that you wish to erase.
Just like that, the pigment will be activated and lifted from the paper!
However, it must be noted that this watercolour hack works better on non-staining pigments or on paper that has fewer layers.
But you can still use this hack on staining pigments, too. Once you’ve erased the watercolour, you can paint over it as a means to easily fix watercolour mistakes.
2. Draw Your Preliminary Sketch with Watercolour Pencils
This piece of advice is perfect for you if you’re learning how to do watercolour for beginners.
Essentially, this watercolour hack requires you to sketch an underpainting with watercolour pencils. The preliminary sketch helps you map out the composition before you begin painting.
In other words, this strategy will help you produce better watercolour paintings.
This technique is genius because watercolour pencils are water-soluble, meaning the pigment will disperse when water is added to it.
So, instead of drawing your thumbnail with messy graphite, you should draw the underpainting with watercolour pencils because the pigment will dissolve into your painting.
Just make sure that the colours you use for the underpainting match the colour palette that you intend to use in the final painting.
After all, you want the colours to blend together seamlessly. So swatch the colours on a scrap piece of paper if you need to test the colours beforehand.
If you’re interested, check out this article which shares even more strategies that will help you turn a struggling watercolour painting in a work of art.
3. How Do You Add Stars to Watercolour?
Watercolour galaxies and night skies are beautiful, aren’t they?
But there’s no way you’re going to paint all those stars individually, right? So how do you speed up the painting process?
Well, try this clever watercolour hack.
- First, use white gouache or white ink because this kind of opaque pigment will create bold stars
- Second, load up a toothbrush with the diluted pigment. Make sure it’s not too watery but not too solid. A nice in-between is what you want to strive for
- Third, hold the brush and use your thumb to pull back the bristles. By doing do, the bristles will flick and splatter dozens of tiny stars across the artwork
Repeat these steps until you have created a gorgeous sky full of stars. Then, use a paintbrush or a white gel pen to add a few bigger stars or comets for more visual interest.
For instructions on how to splatter stars, check out this useful watercolour tutorial: How to Paint Beautiful Night Sky Paintings.
4. Plein Air Painting Hacks
Do you like painting outside when the weather is beautiful?
If you do, then here are 2 plein air painting hacks that will make your life easier when you paint outside:
- Take a small portable watercolour palette with you. The lighter and more compact the palette, the easier it will be for you to carry around
- Take a few watercolour brushes that have water reservoirs. All you have to do is fill them up and you’re done! This eliminates the need for you to bring 2 jars of water
My personal recommendations are the Winsor & Newton Sketchers Box combined with the portable Pentel Aqua Brushes. They’re both affordable options for beginner plein air painters.
By swapping your regular watercolour supplies for these convenient alternatives, you can make your watercolour plein air painting experience so much easier and hassle free.
So, try these watercolour hacks the next time you paint outdoors.
Related: Plein Air Painting Guide for Watercolour Artists
5. Create Texture by Using Advanced Watercolour Techniques
If you’re a beginner, it’s important that you learn about basic watercolour techniques all artists should know.
But if you’re a novice or a more advanced painter who is looking for advanced watercolour techniques, then I highly recommend that you check out these painting hacks!
- When your watercolour paper is still damp, add a handful of salt to the paper. The salt will dissolve into the watery pigment, thus creating unique little crystal-like textures
- Cut a piece of plastic wrap and use gentle pressure to press the plastic into dampened watercolour paper. You can move the plastic around to manipulate the wet paint. Once the paint has dried, remove the plastic wrap to see the spontaneous textures that have been created
- Find an old paintbrush with bristles that are frayed and uneven. Load up the paintbrush with slightly diluted watercolour pigment and use the dry brush technique all over your paper. The rough bristles will create fuzzy-looking textures that perfectly mimic grass, bushes, and bundles of leaves
Basically, the point is to use common household items to create dynamic textures in your watercolour paintings.
Check out the painting below to observe how I used an old paintbrush with frayed bristles to create the texture of the trees.
6. Use A Sponge to Create Unique Texture
There are many watercolour painting hacks that you can use to create unique textures. And this is one of my favourites!
An easy way to paint foliage is to load up a textured sponge with watercolour pigment.
Then, all you have to do is dab the sponge all over the areas where you want the tree foliage to appear.
This way, you can quickly and easily create foliage that looks realistic and visually appealing.
For maximum effect, combine 2 or 3 colours to create highlights, mid-tones, and shadows if you want the tree to look more authentic.
And voilà, you’ve painted a super easy tree!
Related: Discover 9 benefits of watercolour painting for artists.
7. Apply Masking Fluid to Preserve the White of the Paper
There are a lot of cool watercolour hacks. And one of them is to use masking fluid or a masking pen to preserve the white of the paper.
Alternatively, you can use a white coloured pencil that is wax-based to preserve the whites since watercolour pigment will not dry over wax-based substances.
All you have to do is apply the making fluid or the coloured pencil to the areas of the paper that you wish to preserve.
For example, you can use this technique to create wispy feathers, moonlight reflections, or lightning bolts in a storm.
Give it a try the next time you take out your watercolours!
8. How Do You Keep Watercolour Paper Flat?
Nothing is worse than watching your watercolour paper buckle and warp after you’ve added water to it.
Generally speaking, I have found that there are 2 ways to keep watercolour paper flat:
- Attach large binder clips to the edges of your paper in order to flatten and hold down the paper. This technique works best if you’re painting in a watercolour sketchbook
- Buy a watercolour block because the paper is already flattened. Once you’re done painting, all you have to do is use a knife to gently separate the paper from the block. It’s easy, simple, and fast!
But if your painting buckled and warped by the time you already finished painting, then you can find a few heavy books and place the artwork under those books for 24 hours.
Come back and check a day later to see that your artwork has flattened out.
9. Use White Gouache or White Ink for Highlights
Watercolour and gouache paintings look beautiful, but sometimes they need a little extra pizazz to really stand out and catch someone’s eye.
As such, a good way to add more dimension to your painting is to use white gouache or white ink to create additional details such as:
- Bright highlights
- Stars, shooting stars, and comets
- Reflections on water, skin, or shiny surfaces
It should be noted that this step is best reserved for last after you have painted all the layers and added shadows to the artwork.
By adding the highlights last, you don’t run the risk of accidentally muddying the white pigment.
Check out the painting below to see how I used white gouache to add highlights and details to the finished painting.
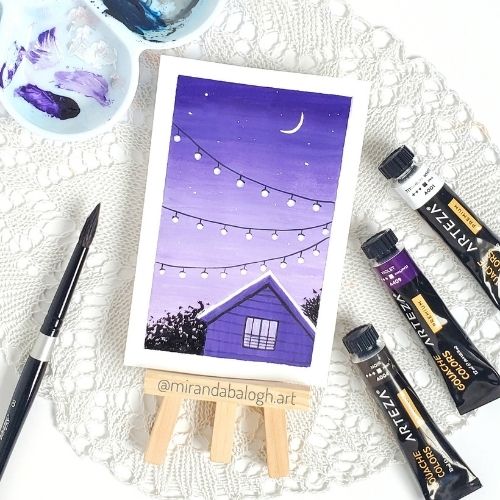
Recommended: Winsor & Newton White Gouache and Winsor & Newton White Ink
10. Save Time by Painting 2 Pieces at Once
One of the best watercolour hacks for beginners is to paint 2 paintings simultaneously so that you can better optimize your time.
To do this, all you have to do is prepare 2 pieces of watercolour paper. Begin working on the first layer of the first painting.
While you’re waiting for that layer to dry, begin the first layer of the second painting so that you can keep working in a creative flow state. This prevents you from starting and stopping or possibly forgetting to finish your artwork.
What’s more, working on a second painting while the first painting dries allows you to keep creating art without wasting time waiting around for the layers to dry.
Best of all, alternating between 2 paintings allows you to create twice as many paintings in one sitting.
Related: Discover how to consistently create beautiful watercolour paintings by learning the 3 secrets of good watercolour paintings.
11. Activate Watercolour Pans with A Spray Bottle
Do you know how to use watercolour cakes or pans most effectively?
If not, then you should check out this fast and easy watercolour hack!
Instead of activating each watercolour pan individually, you can do them all at once by using a spray bottle.
I use this art hack all the time when I take out my favourite set of watercolour pans, which are the White Nights Watercolour Set of 36.
All you have to do is fill a spray bottle with water. Then, gently mist all of your watercolour paints with a few sprits.
Wait about a minute or so for the pigments to become activated. Once they’re activated, you can dip your paintbrush into the moist pigment and start painting!
White Nights Watercolours
• 36 large pans with a diverse range of watercolour pigments
• The vibrant pigments blend easily and have very smooth application
• Box comes with useful and detailed pigment information
BUY ON AMAZON12. Use A Hairdryer to Speed Up the Drying Process
Are you sick and tired of waiting around for each layer to dry?
Yeah, me too.
So, here’s a good watercolour hack to try if you’re in a hurry or if you’re just impatient.
Take out a hairdryer, put it on low speed so as to not blow the watercolour pigment around spontaneously, and begin drying your paper.
Move the warm air across the paper from left to right. As well, you’ll want to move the air from top to bottom.
Make sure you repeat this process a few times until you’re sure that the layer is completely dry.
To check if the moisture has evaporated, take the tip of your finger and gently touch the paper. If the pigment is dry and doesn’t stick to your finger, then you’re ready to start painting another layer.
Note: This art hack can also work with a hand fan.
13. Protect Graphite Paintings with Watercolour
I learned about this watercolour hack from a talented art YouTuber named HulloAlice.
In a nutshell, you can protect your graphite drawings from smudging by painting a thin layer of watercolour over the graphite.
Cool, right?
The watercolour pigment acts as a seal which binds the graphite and the paint pigments into the paper.
In order to achieve this, all you have to do is dilute a colour of choice and then use a damp paintbrush to glaze the pigment over the graphite drawing.
Since you’re technically not creating a traditional painting, make sure that you aren’t soaking your brush.
Paint over the graphite and wait for the pigment to dry. Once it has dried, you’ll be able to rub your finger over the graphite and it will no longer smudge!
This watercolour art hack is a clever way to preserve graphite drawings that may otherwise fall victim to smudging.
14. How Do You Paint Clouds in Watercolour?
Want to learn about a fast and easy watercolour hack that will help you paint watercolour clouds?
Then try this!
- First, take a tissue paper or a paper towel and crumple it up
- Next, scrunch it up into a firm little ball
- Third, dab the tissue paper across the damp watercolour sky and lift the wet pigment from the paper. You need to work quickly in order to pick up the pigment before it dries
- Repeat the process as many times as you want in order to create white fluffy patches in the sky
This art hack is an alternative way to paints clouds, so give it a try the next time you’re painting skies.
Have a look at the painting below to see how I used a simple tissue to create fluffy white clouds.
15. Painter’s Tape Hack
Let me guess…
At some point, you’ve accidentally ripped your watercolour paper because the tape you were using decided to act naughty and not cooperate.
I bet you can relate.
So, a clever way to work around this problem is to do the following:
- First, cut the strip of tape to your desired length
- Second, rub the tape against your jeans. Make sure that the sticky substance rubs against the denim
- Third, lift the tape from your jeans and then use it to tape down the border of your watercolour paper
- Fourth, repeat these steps until all edges are taped down
When you peel the tape off, you’ll notice that each piece of tape comes off much more smoothly.
Why?
Because rubbing the tape against denim weakens the strength of the sticky substance. As a result, the tape will be less likely to tear your finished painting!
Conclusion
There you have it!
In this article, you’ve learned about 15 cool watercolour hacks to use in your paintings.
And best of all, these art hacks are either free or super cheap to do!
Therefore, the next time you take out your paints and brushes, come back to this list and give some of these hacks a try.
I’m sure that you’ll enjoy several of them because they simplify, speed up, or beautify your paintings.
For more awesome watercolour tips and tricks, check out these blog posts:
- 8 Important Tips You Should Know Before Painting With Watercolours
- 6 Expert Watercolour Tips That’ll Make You Paint with Confidence
Have fun painting with watercolours!
What is your favourite watercolour hack? Share your secret in the comments below!

Miranda Balogh
Artist & Online Educator





That is so cool you can use a hair dryer to speed up the drying of the paint.
I know, right? It’s such a useful watercolour hack!
These are so helpful, I would love to watercolor!
I’m glad you enjoyed this article!
Great ideas! I’m a beginner watercolor painter so this was good info. Will follow you in Instagram!
Awesome, thank you very much!
I haven’t done watercolor painting in years! Reading these helpful hacks has inspired me to give it another go. Thanks!
You’re welcome! Have fun painting again.
Great tips to keep the paper from buckling! That can be so frustrating. Thanks for sharing!
Thank you! I’m glad you found these watercolour hacks helpful.
I really wanna get back into painting, so this was a very useful read!
How exciting! Have fun painting again.
Hi Miranda,
Sad to say, I know most of what you you’ve presented here, but the main problem I have is the lack of patience, If I can’t finish a painting in an hour I’m exasperated. And this ofcoarce led to me laying down too many layers into a short time resulting in enough mud for children the make pies out of. Another problem I have is not knowing what style I wan’t to fo; follow, I don’t want to loose or abstract paint, what I want to be is another John Constable but that ain’t gonna be, I don’t have enough time left, I’m ninety-two I have no feeling in my fingertips. my hands jerk and I’m in aged care. But the great thing for me has been the challenge and I still love to learn.
Hi John!
I can relate to the struggle of not having enough patience when it comes to creating my art. It’s a challenge sometimes, but it’s also a wonderful lesson to learn.
As well, painting at age ninety-two is amazing! The fact that you still enjoy learning and creating is absolutely wonderful to hear.
Thank you for sharing!