We look up at the night sky to observe constellations, make wishes, and contemplate the universe.
These are just a few of the emotions that we can invoke in our own artworks whenever we paint night skies.
But, as an artist, the problem you might be wondering is: How do I make my night sky painting look amazing?
In this night sky painting tutorial, I’ll guide you through:
- A simple step by step process to create a night sky painting
- A list of recommended supplies that you will need
- Watercolour tricks and tips to make painting easier
By the time you’re finished, you’ll have the knowledge to paint starry night sky paintings that you’ll be proud of!
DISCLOSURE: This post contains affiliate links. If you make a qualified purchase using any of the links, I will earn a small commission at no extra cost to you. I appreciate every sale because it supports my mission as well as the continued growth of this website.
Table of Contents
Materials You Will Need
Before beginning, you must make sure that you have prepped all the proper materials.
Nothing is worse than getting half way through your painting only to realize that you forgot one of your supplies.
Below is a list of art supplies that you’ll need:
- Watercolour paints (I’m using White Nights Watercolour Paints)
- Watercolour brushes (I’m using Silver Black Velvet Brushes)
- Watercolour paper (I’m using Arches Cold-Pressed Paper)
- Mixing palette (I’m using Meeden Porcelain Mixing Palette)
- Masking tape (I’m using Pro Artist Tape)
- Heat tool/gun (I’m using Mlife Mini Heat Gun)
- 2 jars of water
- Black ink (I’m using Speedball Black Ink)
- White ink (I’m using Winsor & Newton White Ink)
- Graphite pencil (I’m using Staedtler Mars Lumograph Pencils)
- Eraser (I’m using a Faber-Castell Kneaded Eraser)
Now that you identified the materials you will need, go ahead and gather them. Then return to this article when you’re ready to start!
The painting’s beauty lies in it’s simplicity, and it’s rather quick and easy to create. That makes it perfect for artists who are looking for a fun little project to do!

1. Create a Thumbnail For Your Night Sky Painting
Slow down there!
I know it’s exciting to dive right into the fun stuff, but there’s still one more thing you should do before you begin painting.
After all, remember the wise words of Benjamin Franklin:
If you fail to prepare, you are preparing to fail.
I always recommend that before you start painting with watercolours, you prepare by drawing a few thumbnails either in your sketchbook or on a scrap piece of paper.
A thumbnail is a small sketch that artists use to map out the composition of their artwork before they start creating it.
Drawing a thumbnail helps you envision the picture by organizing the elements and values beforehand. So you should create a thumbnail to act as a point of reference for your painting.
So, divide your thumbnail into three lines vertically and three lines horizontally so that the boxes are evenly spaced.
- First, the lower third of the painting will represent the land, so create random lines to outline the forest of trees.
- Next, draw a circle or crescent somewhere in the sky to indicate where the moon is. You can add comets or any other celestial entity if you’d like.
- If you need inspiration, check out this Google Images search to find tons of night sky paintings to use as drawing inspiration for your thumbnail.

2. Choose Your Colour Palette
You don’t have to choose the exact colours that I’m using in this tutorial, so feel free to use whatever colours you have.
Just make sure to test your paints beforehand by swatching them and making sure that the colours blend well together.
In fact, check out this article which is written to give beginners advice on how to avoid making common watercolour mistakes.
Nothing is worse than when you commit to using colours that create muddy browns. So here’s how to choose an optimal colour palette:
- Limit your palette to 3 colours so as to not overcomplicate things
- Use black or Payne’s Gray as the darkest colour
- Use white for the stars
In this night sky painting tutorial, I’m using White Nights Watercolours Set of 36 Whole Pans. I highly recommend them because the paints are smooth, they blend well, and the set is affordable for professional quality paints.
3 of the colours will create the colourful sky, the black (or Payne’s Gray) will darken the sky to give it the nighttime appearance, and the white will be used to create the stars.
- Colour 1: Yellow
- Colour 2: Turquoise Blue
- Colour 3: Indanthrene Blue
- Colour 4: Payne’s Gray (an alternative to Neutral Black)
- Colour 5: Zinc White (an alternative could be white gouache)
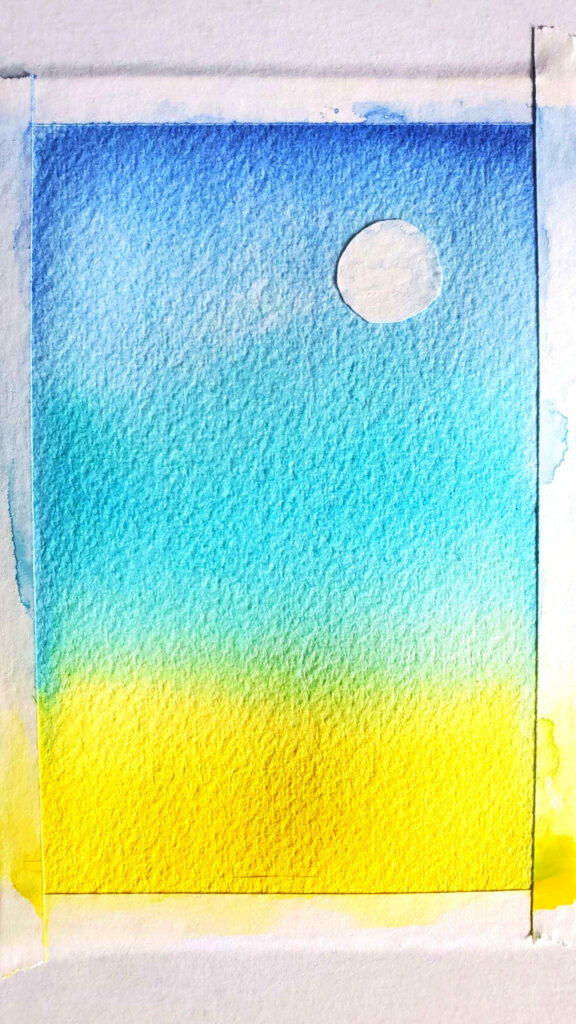
3. Paint the Background Layers
Alright, it’s time to rumble!
Tape down the edges and corners of the paper. You should do this in order to keep the paper flat during the painting process.
If you want to create a starry night sky painting with masking fluid, make sure you block off a circular or crescent-shaped section of the sky where you want the moon to be.
Or, alternatively, you can cut out a piece of your tape in the shape of a circle or crescent and use that instead. Both options work well.
- Now, take a pencil and lightly sketch in the outlines of the mountains and trees on the watercolour paper. It should resemble the thumbnail you already created
- Take your largest brush and soak it. Then, gently brush it across the entire surface of the paper. Make sure the water’s not beading
For optimal results, the paper should have an even and glossy sheen. If there are excess beads of water, dab them with a paper towel.
- Dip your brush into your lightest colour (here I’m using Yellow) and glide the brush across the bottom of the paper, working your way up
- Grab your second colour and repeat step 3. This time, you want to concentrate the colour above your first colour to blend them. This time, I’m using Turquoise Blue
- Take your darkest colour and repeat step 3. I’m using Indanthrene blue
If you’re wondering why your painting looks like a giant blob of ugliness, don’t fear! It’s perfectly normal for a watercolour painting to go through a so-called “ugly stage.”
4. Build Up the Layers
This next step is super easy:
All you have to do is repeat steps 1 to 5 from the previous section in order to intensify the colours and build upon the previous layer.
Just make sure you’re controlling the water well but using an appropriate water to paint ratio when painting each new layer.
Then, you’re going to add one more step:
- 6. Add Payne’s Gray (or black) to the top of the painting, which is the darkest part of the night sky. The more you add, the darker the sky will appear.
So, when your night sky painting has dried, go ahead and rewet the paper to add more colours to the night sky.
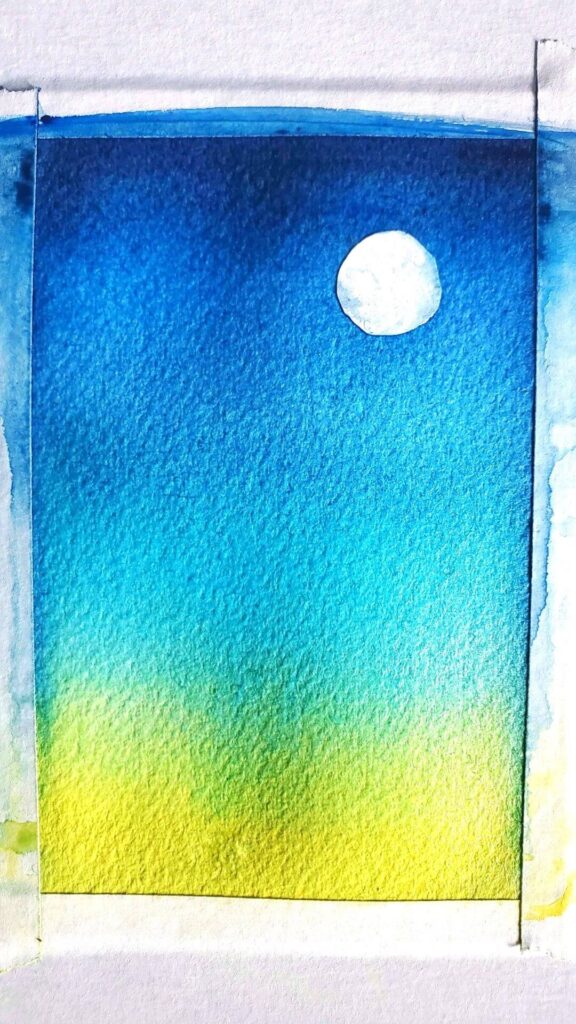
Once you have repeated the steps to build up your second layer, wait for the paper to dry.
At this point, you could add another layer if you’re not yet satisfied with the night sky. After all, layering helps you learn how to achieve transparency in watercolour.
Note: This layer looks more vibrant because the first layer is showing through the second layer, which intensifies the colourful pigments.
5. Splatter the Stars
At this point, I like to paint the stars using the splattering technique.
The splattering technique is when you load up your brush with paint and tap the brush to create tons of little speckles on your painting.
The splattering technique one of the most enjoyable watercolour techniques that lends itself very well to night sky paintings.
You could do this step after painting the trees, but I prefer to do it before so that I don’t risk getting stars all over the dark silhouettes.
So, to splatter the stars, you need to use either two brushes or a toothbrush. The choice is yours.
To effectively splatter the stars, do the following:
- First, dilute the white paint (or use ink). Here I’m diluting Zinc White
- Second, load up your brush with the paint. Make sure it’s not too watery or else you will splatter water droplets all over the painting
- Third, tap your brush against another brush. Do this gently, and observe how the paint splatters flecks of white all over the paper
- If you splatter too many stars, use a tissue or paper towel to dab away any unwanted stars or water drops
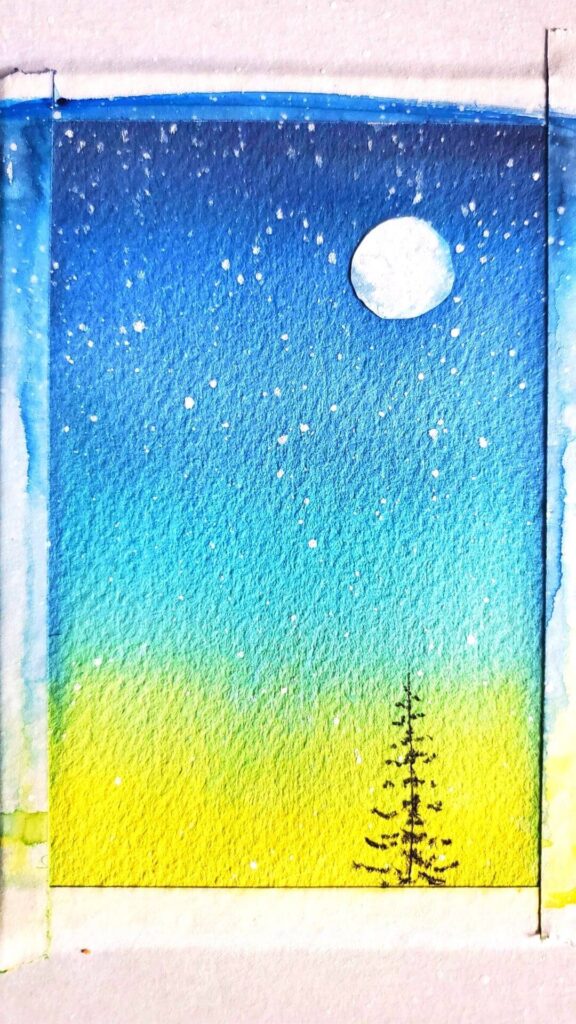
6. Paint the Tree Silhouettes
In this section, you’re going to use black, Payne’s Gray, or India ink for the trees.
When analyzing depth, remember these guidelines:
- Objects that are closer to the viewer (in the foreground) tend to be darker
- Objects that are father away from the viewer (in the background) tend to be lighter
Paint a couple of vertical lines where you want the trees to be. Make sure they are varying in height so that the trees look more organic.
Don’t add too many big trees because the focus should be on the sky. After all, you don’t want the trees to distract from the beautiful night sky painting that you’re creating.
Note: Your brushstrokes should be random and not orderly so as to give the trees a more organic and authentic feel.
When you’re finished, allow the paint to dry before you proceed to the final steps.
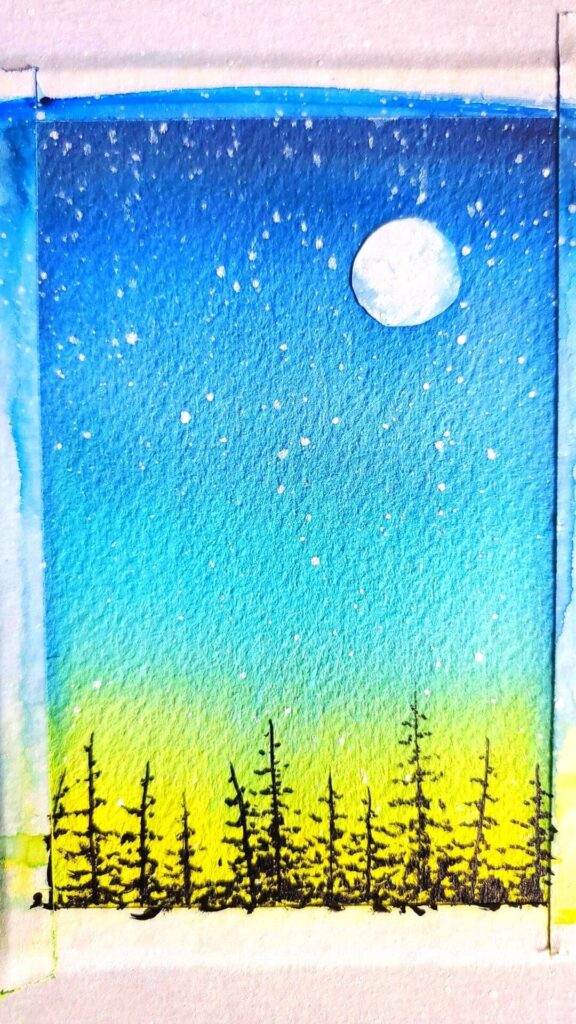
7. The Finishing Touches
Last but not least, you’re going to paint the beautiful moon and add some finishing touches!
If you used masking fluid, rub the dried fluid off of the area where you planned to put the moon. If you used a piece of tape, take it off now.
If you want to add additional details such as craters to the moon, be very careful so that you don’t overdo or run your pretty moon.
If you opted for white gouache, paint your moon on top of the dried watercolour paint.
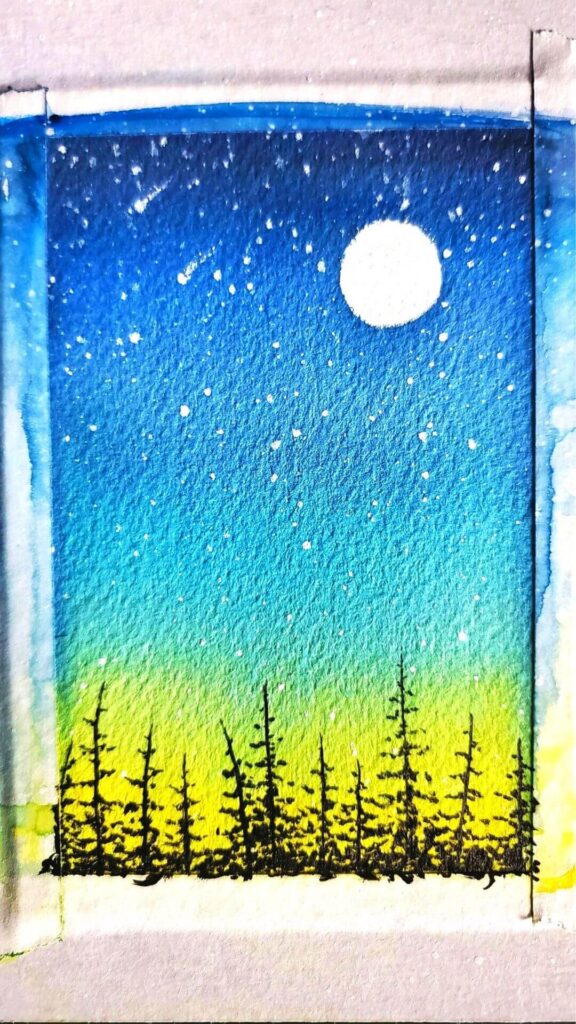
And now you’ve created a starry night sky painting with a moon!
Here are a few additional things you can do to add more detail to your painting:
Your brushstrokes should be random and not orderly so as to give the trees a more organic and authentic feel- Darken the bottom of the trees to make the forest look fuller, but make sure the tops are more sparse since the foliage is less dense
- Add comets or sparkling stars of various sizes to your sky to add visual interest and variety
To finish, all you have to do is peel the tape away from the borders of your painting, and you’re all done!
Wasn’t that really easy to paint?
Conclusion
In this step by step tutorial, you learned how to create an easy night sky painting that will wow your friends and family.
You learned about the importance of using the wet on wet technique. And you incorporated the splattering technique to make stars.
As well, you understood why thumbnails are crucial for planning out a painting’s composition beforehand.
Now, if you enjoy learning to paint with watercolours, I highly encourage you to check out these popular watercolour tutorials:
- Sunset watercolour silhouette painting tutorial
- Monochrome watercolour painting tutorial
- 5 simple watercolour tutorials for beginners
Do you enjoy watercolour painting? If so, what’s your favourite thing to paint? Share your opinion in the comments below!

Miranda Balogh
Artist & Online Educator


Beautiful. Thanks for sharing this helpful post!
~Michelle
You’re welcome! I’m glad you enjoyed this watercolour tutorial.
Very useful tips, thank you
You’re welcome!
Wow. The layering makes a huge difference. Thanks!
You’re welcome!