So… You want to learn how to paint with watercolours.
At some point, you may have asked yourself, “Why paint with watercolours?”
You should learn to paint with watercolours in order to develop an artistic skill that is respected by many people who value fine art. After all, watercolour paintings are praised for their luminous and transparent qualities, which is why this style of artwork is often featured in art galleries and museums around the world.
However, many beginners are intimidated to get started because they’ve heard that watercolour is difficult to learn.
But this article will prove to you that as long as you have the right supplies and basic foundational knowledge, watercolour isn’t too hard to learn.
In fact, by the time you finish reading this article, you’ll have the knowledge and confidence to master the wonderful craft of watercolour!
DISCLOSURE: This post contains affiliate links. If you make a qualified purchase using any of the links, I will earn a small commission at no extra cost to you. I appreciate every sale because it supports my mission as well as the continued growth of this website.
Table of Contents
Watercolour Tubes Vs. Pans Vs. Pencils
You need to invest in a decent set of watercolour paints (if you haven’t done so already) in order to excel at watercolours.
The following sections outline the pros and cons for watercolour tubes, pans, and pencils. You can use this information to inform your future purchasing decisions.
Tubes
So, you might be wondering how to use watercolour paint tubes.
Watercolour tubes come in small plastic containers that contain liquid paint. Often, tubes are suitable for painting on larger canvases.
To use these paints, you must invest in a watercolour palette, for this will be the surface upon which you dilute and mix your colours.
First, add a bit of water to the paint in order to dilute it. Then, simply load up your paintbrush and start painting.
| – Highly pigmented colours – Great when you need lots of paint for larger paintings – Can be used to refill pans | – Uncapped tubes will lead to the paint drying out – Runs out of paint faster – Not portable unless tube paint is stored in a sealable palette |
Sennelier L’Aquarelle Watercolors
• 12 tubes with 10ml of pigment, so your paints will last a long time
• Rich and creamy pigments have smooth application
• Layers appear transparent, luminous, and vibrant when they’ve dried
BUY ON AMAZONPans
So, you might be wondering how to use watercolour pans.
Watercolour pans (also referred to as “cakes”) are small rectangular containers that hold paint inside them. These paints are usually stored in plastic boxes.
It should be noted that watercolour pans must be activated with water or else they will remain dry.
So, simply spray the paints with a spray bottle and wait a minute or so. Then, dip your paintbrush into the pan to load up your brush.
| – Portable and easy to transport – Pans have great longevity; a good set can last 10 years! – Able to rearrange the pans easily and however you like | – Takes longer to activate the paint with water – Colours are a bit less vibrant – Dust may enter an uncovered palette and get into the pan |
White Nights Watercolours
• 36 large pans with a diverse range of watercolour pigments
• The vibrant pigments blend easily and have very smooth application
• Box comes with useful and detailed pigment information
BUY ON AMAZONPencils
Alternatively, some watercolourists are interested in learning how to paint with watercolour pencils.
They’re used in much the same way as any old graphite pencil. Simply apply the pencil to the paper, and lay more colour down if you desire.
However, where they differ is that watercolour pencils have the ability to be used wet or dry. The choice is up to you!
Just add water in order to achieve a loose watercolour style.
| – Very versatile: can be used both wet or dry – Portable and easy to carry – Works with different mediums (good for mixed media) | – Colours don’t dry as vividly as tube or pan paint – Colour choices might be limited depending on the set |
Faber-Castell Watercolour Pencils
• 24 vibrant watercolour pencils in a wide range of colours
• These dynamic pencils can be used either wet or dry
• Pigments lay down smoothly and are easy to layer or blend
BUY ON AMAZONStudent Vs. Professional Grade Paints
Student Grade Paints
Student grade paints are commonly used by beginner and novice watercolourists who’re learning how to paint with watercolours.
In a nutshell, here is a chart that breaks down the pros and cons of investing in student grade paints:
| – Very affordable for artists – Great for experimenting with colours and new techniquesy – Great option for beginners and hobbyists | – Paints usually contain fillers (not real pigment) – Inferior quality makes them harder to paint with |
Winsor & Newton Cotman Watercolors
• 12 vibrant pigments that blend and mix well together
• Small box that’s lightweight, portable, and convenient to carry
• Very affordable set that’s suitable for all beginners
BUY ON AMAZONProfessional Grade Paints
As the name implies, professional grade paints are often used by experienced watercolourists. The paints are of superior quality, so they’re more vibrant, transparent, and are easier to apply on paper.
However, like everything in life, these professional paints have their own unique pros and cons. Here’s a break down:
| – Pigmented and vibrant colours – Usually good lightfastness – A little paint goes a long way – Almost always comes with a detailed chart for each paint | – Very expensive – Beginners might waste the high-quality paint |
Sennelier L’Aquarelle Watercolors
• 12 tubes with 10ml of pigment, so your paints will last a long time
• Rich and creamy pigments have smooth application
• Layers appear transparent, luminous, and vibrant when they’ve dried
BUY ON AMAZONWhat’s the Best Watercolour Paper?
Believe me, investing in good-quality watercolour paper can seriously speed up your learning process and make painting more enjoyable.
But often enough, it frustrates beginners and sometimes even makes talented painters give up on watercolour.
Conversely, cheap paper is known for being difficult to work with. Although, that’s not to say that all cheap watercolour paper is bad.
So, when it comes to investing in high-quality watercolour paper, look for these details to determine if it’s worth the investment:
| – 100% cotton – 300 gsm (140 lbs) – Cold or hot-pressed – Acid free – Can handle heavy washes – Doesn’t buckle or warp easily | – Made of cellulose or wood pulp – Printer, marker, drawing paper – Buckles and warps easily |
Arches Cold-Pressed Watercolor Paper
• 100% cotton paper is super water absorbent and ideal for watercolours
• 300 gsm (140 lbs) is thick paper, so it can handle many layers of pigment
• Acid free: Your paper won’t turn yellow
BUY ON AMAZONWhat Are the Best Watercolour Brushes?
Alright, so you’ve picked your watercolour paints and paper. Now you need to invest in some decent brushes.
Let me first debunk a common watercolour myth about brushes: You can use acrylic paintbrushes for watercolour painting. This is FALSE because acrylic bristles aren’t suitable for watercolours.
So how do you know which brushes to purchase?
Basically, you want a thirsty brush that holds lots of water and paint. These brushes last longer, and they make it easier for you to master the paint to water ratio for better water control.
I’m going to simplify the decision-making process by presenting you with this chart. It will give you a brief overview of the pros and cons of synthetic versus natural hair brushes.
| – Cheaper and more affordable – Bristles are of lower quality – Brush tips are less versatile – They fall apart faster – Easier to control for beginners | – Can be quite expensive – Bristles are of superior quality – Brush tips are versatile – Brushes can last 10+ years – Difficult to use for beginners |
Silver Black Velvet Watercolour Brushes
• Comes with a size 6 round brush, size 12 round brush, and 1 inch flat brush
• Made from a superior blend of squirrel hair and synthetic fibers
• Fine points, soft bristles, and fibers hold a lot of water
BUY ON AMAZONAdditional Supplies
Before we move on to the next section, there are a few additional supplies that you may want to invest in if you want to seriously learn how to paint with watercolours.
Here is a list of items that watercolourists often use in their craft:
- Mixing palette (I use Meeden Porcelain Mixing Palette)
- Masking tape (I use Pro Artist Tape)
- Heat tool/gun (I use Mlife Mini Heat Gun)
- White ink (I use Winsor & Newton White Ink)
Related: To learn more about all the different types of watercolour paints, brushes, and paper, I recommend that you check out this insightful article.
Watercolour Techniques List
I’ve already written a rather detailed article about fundamental watercolour techniques that all watercolourists should know.
I highly recommend you check it out if you would like a more detailed breakdown of any of the following techniques.
Mastering these techniques will help you skyrocket your skill level as you learn how to paint with watercolours.
Wet on Wet
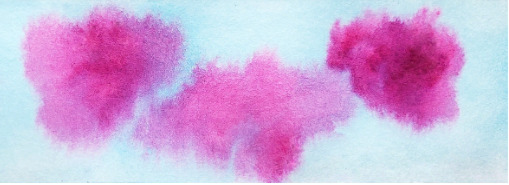
The wet on wet technique is one of the most common skills that you must learn when painting with watercolour.
Wet on wet simply refers to a technique in which you:
- Apply a coat of clear water to the paper
- Use a paintbrush to dab the paint into the wetted area
- Watch as the paint flows freely within the water
Refer to this simple chart to observe the wet on wet technique’s characteristics, and for which types of paintings it is most ideal.
| – Unpredictable – Can be hard to control – Paint flows loosely and freely – Used to create soft edges – Dries lighter on the paper | – Galaxy skies – Smooth sky gradients – Fluffy clouds – Landscape backgrounds |
Wet on Dry
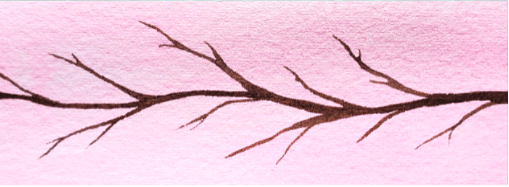
Similar to the previous technique, you are able to apply the wet on dry method if you:
- Dilute the paint on a mixing palette
- Load up your brush with the wet paint
- Paint directly onto the dry paper
This technique is wonderful because it gives you greater control over the paint. This can be helpful if you want to tighten up your painting with details.
If you’re interested in a watercolour tutorial that uses the wet on dry technique, check out this easy monochrome painting tutorial.
| – More control over paint distribution – Colours are more vibrant – Used to create defined edges | – Controlled washes – Precise details – Landscape backgrounds |
Dry Brush
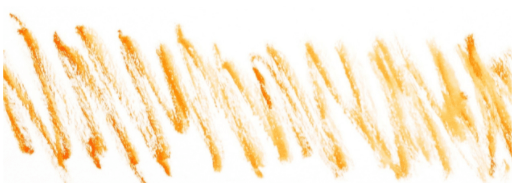
Unlike the aforementioned techniques, the dry brush method requires very little water. Hence the name.
To apply this technique to a painting, you need to:
- Wet the paint very slightly
- Load up your brush with mostly dry paint
- Brush the paint against the paper to create texture
The dry brush technique is really cool because it’s so useful for creating all kinds of neat textures.
| – Great for adding texture – Able to create tons of details – Requires very little water | – Rocky or jagged mountains – Animal fur – Fine blades of grass – Uneven tree bark – Reflections on water |
Flat Wash
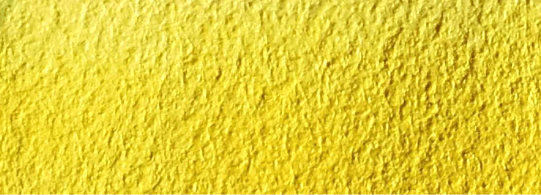
The flat wash is a common technique that is based on creating a wash that is uniform in terms of colour. Because of this, the tone looks flat.
Remember that it’s always best to paint from light to dark because watercolour is a transparent medium. Therefore, it’s easier to build up the intensity of colours than it is if you painted from dark to light.
| – An even and consistent layer of paint that looks “flat” – Must have good water control – May create cauliflower textures – Easier to do with a larger brush | – Skies – Sea or ocean – Landscapes – Backgrounds |
Graded Wash
As the name implies, a graded wash is a wash in which the intensity of the pigment gradually transitions from dark to light.
As the wash progresses, the pigment is diluted. As a result, the vibrancy of the colour thins, which creates a nice range of values.
For this reason, graded washes are really great when practicing watercolour gradients.
| – Easier to transition from dark to light – Produce a nice range of values | – Sunsets – Skies – Landscapes – Background |
Variegated Wash
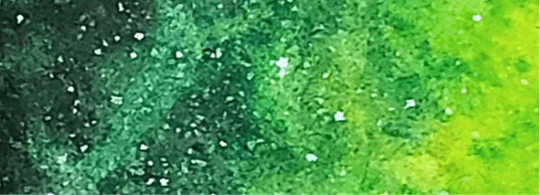
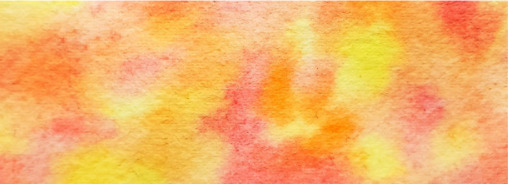
Variegated simply means multi-coloured. As such, the variegated wash is created by mixing multiple colours in one wash.
The result is a wash with multiple transitions between colours and their tones. Depending on the paints you choose, you can create some colourful and gorgeous paintings.
| – Blends colours smoothly – Creates a variety of tones | – Skies – Sunset skies – Galaxies – Backgrounds – Special effects |
How to Paint With Watercolours For Beginners
Create A Colour Chart
It doesn’t matter if you’re new to watercolours or an experienced watercolourist: the fact is, you should create a colour chart and a colour wheel to test and learn more about your paints.
In fact, it’s one of the best watercolour tips to improve your painting skills and artwork more quickly.
Doing this will help you make more informed decisions about the colours you work with in a painting.
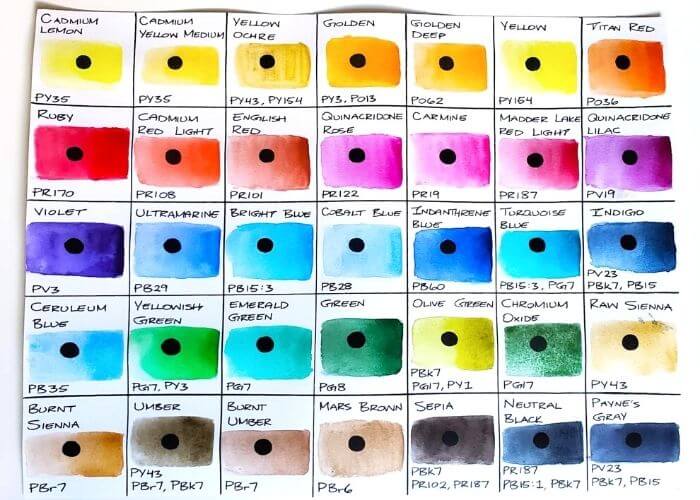
- Start by dividing your paper into boxes. Draw a black circle or line, which will be used to test the paint’s transparency.
- Write the name of the colour at the top, and add any other important information at the bottom (such as the pigment information).
- Swatch each colour on your chart to create a reference guide.
I created this colour chart to test the White Nights Watercolour Paints. The black dot reveals each paint’s transparency. I wrote the pigments below each swatch to understand which paints would/wouldn’t mix well together.
Create A Colour Wheel
Next, you should create a basic colour wheel using your primary colours. Doing this will help you understand the values you can create by mixing your pigments together.
Understanding how your pigments work together will help you learn how to avoid muddy watercolours by creating clear, vibrant mixes.
If you want, you can go a step further by creating a colour wheel for your cool primaries and another wheel for your warm primaries.
Doing this will give you a good idea of the full range of tones you can use in your paintings.
Related: For more information, check out this educational article about understanding colour theory for beginners.
How to Fix Watercolour Mistakes
I’ve already written a comprehensive article about common mistakes watercolour painters make. So, in this article, I’m only going to mention the top 3 mistakes that I believe you should be aware of.
But if you’d like to read about the other 4 to broaden your knowledge, I highly recommend you check it out the link above.
Water Control
Water control is definitely a skill that you must master in order to be proficient at watercolour painting.
Although it may seem difficult, remember that, with regular practice, you’ll get better at controlling the right water to paint ratio.
When you’re learning how to paint with watercolours, it’s important to not use too much water. Basically, you should lay down enough water to create a glossy sheen on your paper.
However, if there are any pools or beads of water, you’ve used too much water. Fix this mistake by dabbing some away with a tissue or use a dry brush to absorb the excess water.
Also, look out for blooms or cauliflower textures. Often, they occur when you’re using too much water.
Let the Layers Dry
One of the best lessons you’ll learn from watercolour painting is to be patient. Very patient.
If you’re not patient, you risk contaminating your colours by making them muddy. Or worse, if you’re creating line and wash watercolour illustrations, you might accidentally smudge the ink and make it bleed.
Watercolour is, after all, a transparent medium. So it’s best if you paint a layer, let it dry, and then return to the painting to build up the intensity of the colours.
Alternatively, if you’re not a patient person, you can use a hair dryer or a hand fan to speed up the drying process.
Just be careful, because if the heat or speed of the device is too strong, it can end up moving around the wet paint, which could ruin your art.
Related: Check out this helpful blog post to discover the best watercolour layering tips that’ll improve your paintings.
Overworking Watercolour
Lastly, you should learn to not overwork your painting. Elsewise, you could unintentionally ruin what you’ve created.
When painting, it’s important to remember the following:
Less is more when you paint with watercolours
For example, if you’ve already created 3 layers, consider whether you really need another one. Will it add more depth or beauty to the painting? If not, you’re done.
Or if you think the shadows aren’t dark enough, consider whether darkening them is necessary. Remember: It’s much more difficult to fix a painting that is too dark than too light.
As you progress in the watercolour journey, you’ll develop an eye for knowing when it’s time to quit while you’re ahead.
For this reason, I highly recommend you check out this article to learn how to stop overworking your watercolours.
What to Paint With Watercolours For Beginners
There are tons of easy watercolour paintings for you to create if you’re a a watercolour beginner! So don’t feel intimidated.
To help you, I’ve brainstormed a list of painting ideas to get you started. Use this list to give you inspiration.
Keep this list on hand because you can even consult these ideas if and when you’re suffering from creative block. Without further ado, here are some painting ideas:
- Lovely sunsets
- Minimalist roses
- Monochromatic mountains
- Galaxies
- Simple pine trees
- Silhouettes
- Starry night skies
- Seascapes or beaches
- City skylines
- Succulents
And if you’re a visual learner who enjoys following easy step-by-step tutorials, check out the popular YouTube watercolour tutorial below. It’s perfect for beginner watercolourists and hobbyists!
Conclusion
Wow, you’ve made it all the way to the end! Congrats!
By now, you’ve gained a ton of valuable information that will help you learn how to paint with watercolours.
You’ve learned how to choose the best quality watercolour supplies for you budget. As well, you know of several watercolour techniques that you can use to experiment with in your own paintings.
You’ve also learned about the importance of creating colour charts and wheels, and you understand how to identify 3 common watercolour mistakes so that you can now correct them.
Now that I’ve given you some awesome painting ideas and learning resources, you’re all set to skyrocket your watercolour skills!
The next step is to continue improving your watercolour education by checking out 9 awesome watercolour advantages that new painters can look forward to.
Are you new to watercolour painting, or are you experienced? Share your thoughts in the comments below!

Miranda Balogh
Artist & Online Educator




Needful content. Keep creating content like this! Tons of love for you
Thank you for taking the time to read my content! It’s very motivating, and I appreciate it.
Thank you for taking the time to share your knowledge. I look forward to following you.
Thank you. Welcome to our art community!
Great inforamative post, thanks for sharing!
Thank you for taking the time to read this post. I really appreciate it!
Such a great list of pros and cons. Nice job!
Thank you! I was motivated to create a pros and cons list because it’s the kind of resource I wish I had back when I was a watercolour beginner. Thanks for sharing!
Sending to my cousin! She’s about to get in the painting spirit <3
That’s awesome! I hope your cousin has a lot of fun painting. Thank you for sharing this watercolour guide with her!
This is great advice! I love using oil paint, but I’ve never really tried watercolor! Thank you for sharing!
Funny enough, I’m the opposite. I’ve only ever painted with watercolours, and I have yet to try my hand at oil painting. It sounds like fun, though! Thank you for sharing your painting experience!
I’ve been perusing articles because I’m trying to learn how to use some of these fancier brushes on my iPad, and this was shockingly helpful. I’m not an artist, but I do a lot of digital work and have been trying to branch out. Glad I stumbled on this one!
That’s really cool! I’ve never used a brush on an iPad, but it’s nice to know this article was still able to help despite it focusing on watercolour brushes. Thanks for sharing this interesting info!
This is amazing. Thanks for sharing. I have always wanted to get into watercolours but it felt overwhelming. This guide is practical and I definitely want to find a way to incorporate my daughters into painting with me.
Thanks! I remember feeling overwhelmed when I was a watercolour beginner because there was so much information to consume and understand. I didn’t want other beginners to feel as confused as I was, which is the reason why I created and shared this watercolour guide. So I’m happy that it was able to help you!
These methods look pretty cool! I remember in school finding watercolor painting to be kinda difficult. They barely scratched the surface technique-wise.
I had a similar experience in school where my art teacher just taught us the bare minimum, which made watercolour painting more difficult than it should have been. But with practice, you discover that it’s really not as intimidating as it seems. Thanks for sharing your story!
This is such an informative post. I would love to start painting. My son started with COVID and he is doing a great job. I am going to share this with him!
That’s awesome! I hope he’s enjoying painting. Definitely give it a try if you’re interested because painting can be so relaxing and fun. Thanks for sharing your story!
Great article with a lot of helpful tips on watercolor! Thanks so much!
You’re welcome! I’m glad you enjoyed this watercolour blog post.
Miranda – reading every single one of your blog posts is a whole artistic experience on its own! This was really well put-together, my personal favorite is using watercolor pencils; there is something magical about sketching then watching the colors blossom out from the water! This was super helpful, have an amazing day!
Thank you for taking the time to read my blogs and for always leaving such thoughtful comments! I love using watercolour pencils, too. I appreciate this painting method because it feels like I’m drawing and painting at the same time, so it’s the best of both worlds. Thanks for sharing your thoughts!
Lovely post! I’d love to try watercolors (after many years), but I just don’t have the time unfortunately 🙂
Thank you! Even if you don’t have time for watercolour art right now, maybe your schedule will free up in the future. Then you’ll be able to pursue painting. Thanks for sharing!
Such great details! I honestly never even thought about the paper quality although it makes so much sense now that you’ve mentioned it!
Oh yes, high-quality watercolour paper can make a world of difference! It’s often something that causes beginner watercolourists to struggle or give up when in fact all they need to do is upgrade their paper to experience better results. Thanks for commenting!
This was a really helpful, thorough post! And I agree soooo much with the part about using good watercolor paper. I used to paint quite often but drifted away from it. This post has me feeling inspired to get back to it 🙂
I’m glad that this article has inspired you! If you do take up watercolour painting again, I wish you the best of luck!
I haven’t done any watercolour painting in years. I think I’ll give it a try after reading this article.
Awesome! It’s always nice to pick up an old hobby again.
Hi Miranda, fellow Canuck here & have taken up watercolouring as a retirement/covid hobby along side my stained glass art. My biggest problem is water control particularly while doing/trying wet on wet. Youtubers tell you to lay down a good amount of water, then add your colors. Problem is they don’t tell you or show you what a good amount is & I end up drowning the paper. I usually load up my mop brush but maybe I need to use a #12 brush instead. I’m using the White Night 24 pan set (love it), Arches 140 paper & Coteman brushes. Thank you for all these insights, tips & extras you send our way. They are all very helpful.
Hey there! Wet on wet takes some practice to get the paint to water ratio just right. But if you’re able to get a glossy sheen without beads of water, you’ll be good to go. Also, your watercolour art supplies art great! I’ve never used the Cotman brushes, but I’ve heard good things about them. Thanks for sharing your experience!
Thanks so much!
You’re welcome! Glad I could help.
Thanks! Very helpful! I’m going to be volunteer teaching some watercolour courses for a womens outdoor group… Good to know what basics are important to teach as I don’t normally think of these things, I just jump in… 🙂
How exciting! Have fun teaching! I think you’re going to enjoy it.