Watercolour silhouette paintings are unique and beautiful.
A silhouette is a solid shape that is completely dark and featureless, and it is usually contrasted against a light background.
In this way, these paintings tell a story, convey an emotion, or depict an atmosphere in ways that traditional paintings do not.
That’s why, in this article, I’m sharing with you a step-by-step watercolour silhouette tutorial to teach you:
- What is a silhouette and how to do create it
- How to paint an easy silhouette painting for beginners
- Useful watercolour tips and techniques you will need to succeed
By the time you’re done reading, you’ll have the confidence to create these paintings with ease and accuracy.
DISCLOSURE: This page contains affiliate links. If you make a qualified purchase using any of the links, I’ll earn a small commission at no extra cost to you. I appreciate every sale because it allows me to create free content to promote the growth of this website.
Table of Contents
What is Silhouette Art?
Silhouette art is created by painting a dark shape that contrasts against a usually light background. The goal is to create a solid shape that is instantly recognizable and identifiable to the viewer despite it not having intricate features or details.
As you can see, silhouettes are used in paintings to tell a story, communicate an emotion, or symbolize a metaphor.
Many artists enjoy creating silhouette artwork because it is easily recognizable and unique in its presentation.
For example, think of the dark shadows that are cast by trees, buildings, people, and other objects. Those shadows are silhouettes!
Materials You Will Need
Before you begin painting, you need to double check that you have all of the required art supplies:
- Watercolour paints (I’m using White Nights Watercolour Paints)
- Watercolour brushes (I’m using Silver Black Velvet Brushes)
- Watercolour paper (I’m using Arches Cold-Pressed Paper)
- Mixing palette (I’m using Meeden Porcelain Mixing Palette)
- Masking tape (I’m using Pro Artist Tape)
- Heat tool/gun (I’m using Mlife Mini Heat Gun)
- 2 jars of water
- Black ink (Optional: I’m using Speedball Black Ink)
- White ink (Optional: I’m using Winsor & Newton White Ink)
- Graphite pencil (I’m using Staedtler Mars Lumograph Pencils)
- Eraser (I’m using a Faber-Castell Kneaded Eraser)
Note: If you don’t have black or white ink, you can substitute those for black and white watercolours. I prefer using ink because it’s bolder, but the choice is up to you.
Once you have gathered all of the required materials, it’s time to start the tutorial to learn all about silhouette painting techniques.
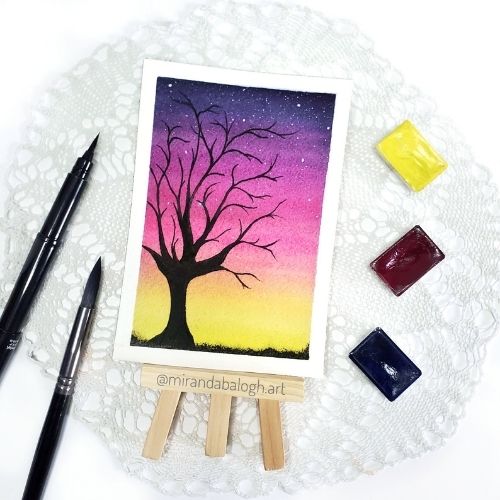
Today, you’ll be painting a watercolour silhouette sunset with a dark tree contrasting against a beautiful twilight sky.
Before you begin, you can have a look at these watercolour silhouette paintings for inspiration.
Step 1: Draw the Rough Sketch of a Tree
Firstly, you need to tape down the edges of your watercolour paper so that the paper stays nice and flat throughout the painting process.
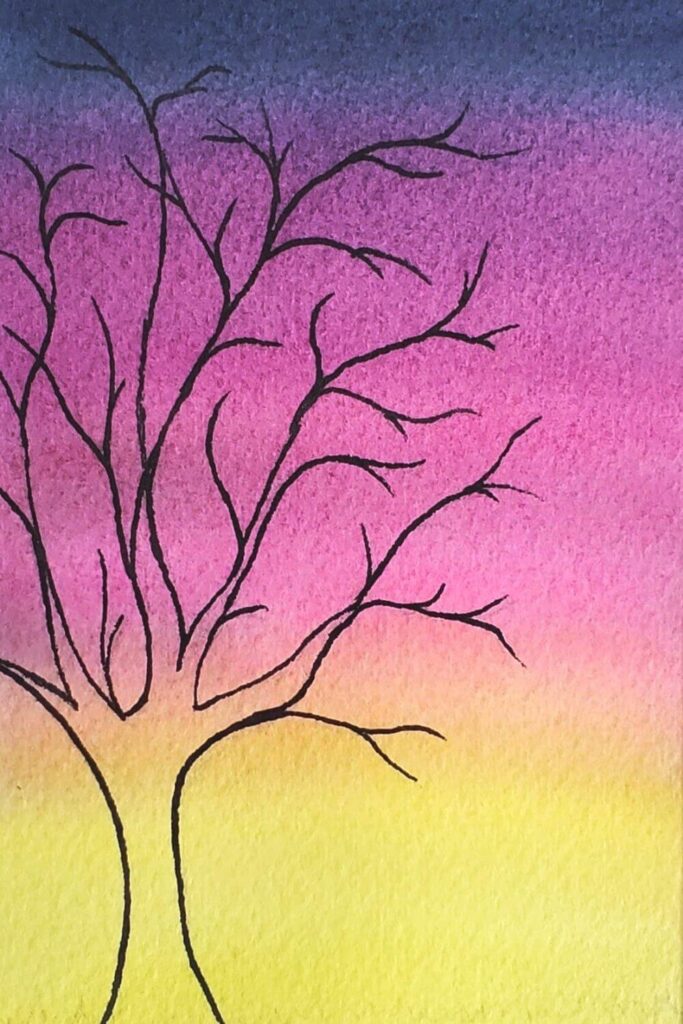
Now, to make the learning process easier for you, I’ve included a rough sketch of a tree which you can copy if you wish. See the reference image below or come up with your own tree design.
Next, you need to follow these simple steps:
- Decide where you want to place the tree. Ideally, it should abide by the Rule of Thirds. To find the ideal points of interest, divide the paper into equal thirds like a tik-tac-toe board. The areas where the lines intersect are the focal points of the artwork
- Start sketching the flowing lines of the tree on either the left or right side of the page. I’m drawing the tree on the left side of the paper. The branches should be loosely drawn and uneven in size to make them look more organic
- Draw a line of grass a little bit above the bottom of the paper. This area designates the lay of the land
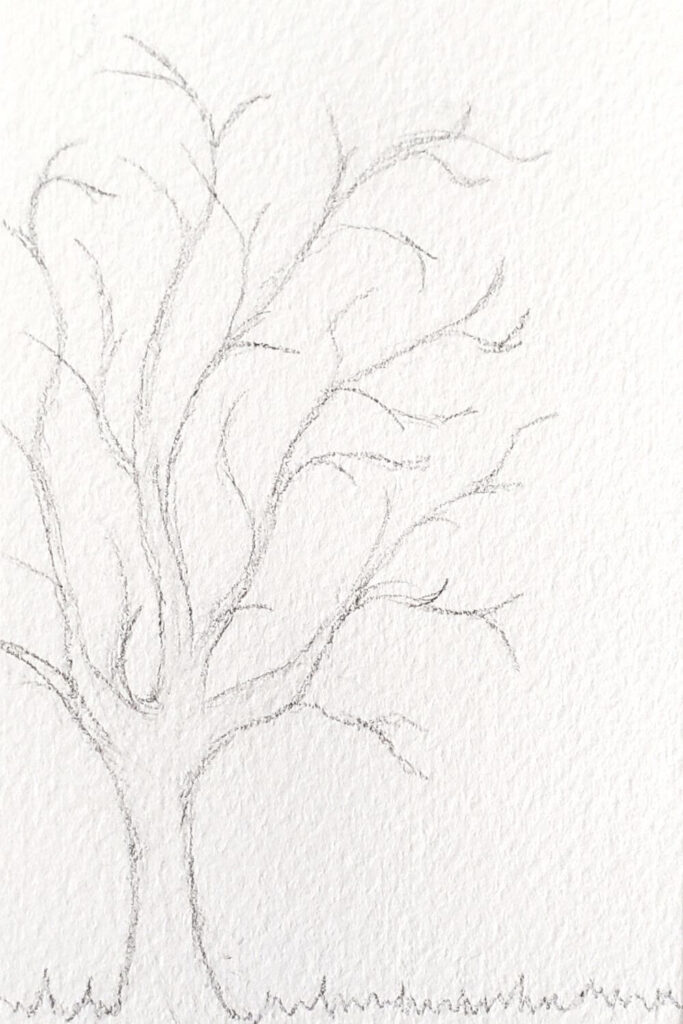
Note: If you are right-handed, I suggest drawing the tree on the right side of the paper because it will be easier for you to apply the ink later without smudging. Likewise, if you’re left-handed, you should draw the tree on the left side.
Step 2: Paint the First Background Layer
Secondly, you are going to apply the first background layer using the wet-on-wet technique, which simply means that you will apply the paint directly onto wetted paper.
To accomplish this watercolour technique, follow these instructions:
- Using the wet-on-wet technique, evenly distribute the water across the paper. Make sure you are using the correct paint to water ratio so that you create an even, glossy sheen
- Take your lightest colour (I’m using Cadmium Lemon) and create light strokes across the lower portion of the paper, going back and forth to smooth out the pigment
- Repeat this step using your medium colour in the middle (I’m using Quinacridone Rose). Focus on painting the lighter colours in the bottom half of the painting while reserving the darker colour (I’m using Indigo) for the top of the sky. This gradation of colour will make the sun look like it is setting in the sky
- Wait for the layer to dry or use your heat gun to speed up the drying process.
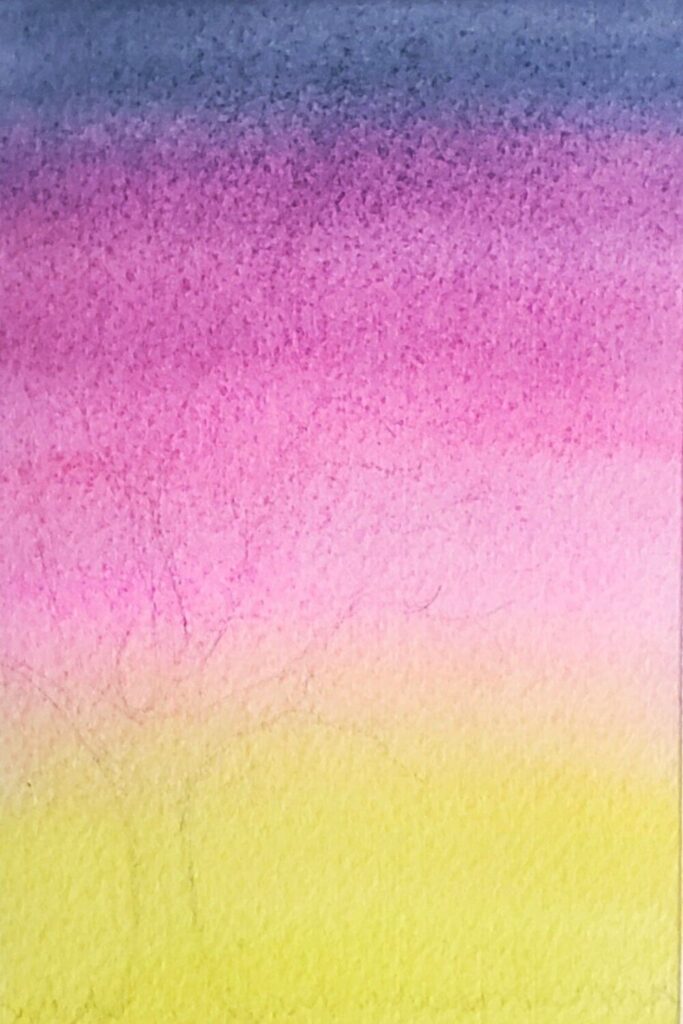
Step 3: Paint the Second Background Layer & Tree Outline
Since watercolour is a transparent medium, you need to work in layers in order to build up the intensity and vibrancy of your colours.
This is one of the most fundamental watercolour techniques that you must develop as you learn to paint with watercolours. So now is the best time to practice this skill!
As such, you will need to paint a second background layer to make your sunset sky look more dynamic.
Here’s what you need to do to accomplish this task:
- Repeat step 2 a second time. The goal is to darken the colours by building up multiple transparent layers
- Make sure your strokes are uneven because that will make the sunset sky appear more natural
- Focus on creating a nice variegated wash, which means the colours are blending freely with one another
- Wait for the layer to dry
- After the layer has dried, go ahead and use black watercolour or black ink to outline the silhouette of the tree. Don’t worry, it doesn’t have to look perfect
Step 4: Ink the Tree Silhouette & Splatter the Stars
Now, go ahead and fill in the silhouette with black watercolour or ink. The tree trunk should be darker with thicker branches, and the top of the tree should have thinner branches.
Wait for the tree to dry before proceeding to the next step.
Keep in mind that this next step is optional. But I love adding stars to my sunset skies because I believe it gives the painting more visual interest.
But if you prefer to leave the sky starless, then that’s perfectly fine, too. In that case, just skip ahead to the fifth step.
If you decide to sprinkle stars in your sky, do the following:
- Load up your paintbrush with white watercolour or ink. Ideally, the consistency should be wet but not soaking wet. Then, gently tap your second brush against it
- The tapping motion will release the watery pigment, thus splattering dozens of tiny stars across your sunset sky
- Make sure you concentrate the stars only at the top of the painting where the sky is the darkest
- Wait for the paint to dry
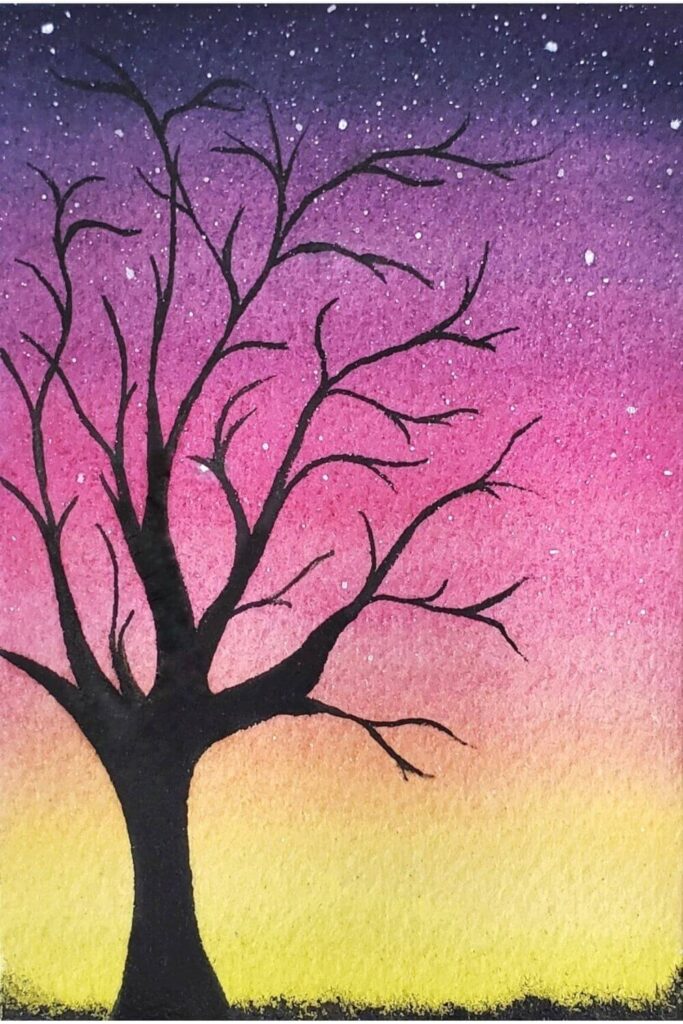
Step 5: Add the Final Details
The hardest part is over, so give yourself a pat on the back!
Before you finish, make sure you take a few minutes to polish up your painting by adding a few finishing touches.
Follow these instructions to adding the final details:
- Once the tree has dried, go back and add some tiny twigs or small leaves that you think will make the tree look fuller and more realistic
- If you want, you may draw the silhouette of a little bird or squirrel in the tree
- Create the grass along the bottom of the painting. You can do this by painting a solid black line that is varied in height. You do not want the grass to be completely level
- Lastly, using thin strokes, paint the individual blades of grass. They should all vary in height and thickness. Creating this variation in each blade will make the grass look more dynamic and realistic
- Wait for the painting to dry
Step 6: Peel Off the Tape
You’ve officially finished your watercolour silhouette painting.
Kudos to you!
Now, all you have to do is peel off the tape. To accomplish this task without ripping the paper, heed the following advice:
- Once you have verified that your painting is completely dry, carefully peel off the tape. Start with one piece by pulling it away slowly and carefully from the paper
- Go around the perimeter of the painting and pull all 4 pieces of tape off one by one
Voilà, you’re all done!
I’d love to see your beautiful artwork. So, if you have Instagram, feel free to tag me @mirandabalogh.art so that I can give your artwork a shoutout in my stories!
Conclusion
That was fun, wasn’t it?
As you can see, silhouette paintings are beautiful pieces of art that are unique in composition and visual storytelling.
The best part is that you can paint almost anything as a silhouette.
But, of course, the more recognizable the silhouette, the easier it will be for the viewer to identify it.
Therefore, you must always keep this point in mind because in order for a silhouette to be readable, it’s shape and form must be easily identifiable by the viewer.
Now that you know how to create watercolour silhouette paintings, I encourage you to experiment with all kinds of different subject matter and backgrounds.
Have fun painting!
If you enjoyed this free watercolour tutorial, you’ll also enjoy:
- How to Paint Beautiful Night Sky Paintings (Watercolour Tutorial)
- Easy Monochrome Painting for Beginners (A Watercolour Tutorial)
- 5 Easy Watercolour Tutorials for Beginners (Step by Step)
Do you enjoy creating silhouette paintings? Why or why not? Share your thoughts in the comments below!
Miranda Balogh
Artist & Online Educator



Hi Miranda! Thanks for an easy tutorial for a beautiful painting! I’ll need to try this!
You’re welcome! I’m glad you liked this watercolour tutorial.
Thank you for the step by step instructions, I can’t wait to find time to try i!
You’re welcome! Have fun painting!
Oh how pretty is that!? Definitely something I’d love to learn to do.
Thanks! When you have some free time, give this painting a try.
I love your simple instructions. So easy to follow and give silhouette watercolor a try.
Thank you! I’m glad you found this watercolour tutorial simple and easy to follow.
I would never have thought I could paint such a beautiful image, but your step by step instructions to paint a silhouette made it sound 100% achievable and like something I want to try for a bit of self care relaxing. Thanks for the inspiration
You’re welcome! Painting is such a great way to practice self-care, so give this tutorial a try whenever you have free time.
Love this, I will have to try sometime.
Awesome! Have fun painting.
Awesome tutorial on how to draw this amazing art. Would love to draw one for my office. Thank you for sharing!
Thank you for leaving such a lovely comment!
This is a very comprehensive tutorial and so detailed that I feel like I could do this successfully. One thing I’m not is an artist of any description!
The finished piece looked absolutely beautiful and I’m looking forward to getting supplies so I can give it a try.
It also helps that you have used beautiful colours.
Have a great week.
Lisa 🙂
Thank you for your positive comment! I’m glad you believe you’re capable of creating this watercolour painting, as that is a positive belief that I want to inspire in all of my readers.
I love painting silhouettes! These are great tips and now I want to go give it a try again. Thanks for sharing!
You’re welcome! Have fun painting.
What a fun tutorial! I am going to have to try this with my kids❤
Have fun painting with your kids!
Great details regarding watercolour silhouette paintings. I so appreciate you taking time to give a very informative tutorial that’s easy to follow. Wonderful post Miranda.
Pastor Natalie
You’re welcome! Glad you enjoyed this tutorial.