Have you ever gazed in awe at a beautiful monochromatic watercolour painting?
If so, then you’ve probably been intrigued by the painting’s unique colour palette.
A monochrome painting is a work of art that is created by using a single colour. In this way, monochromatic art uses a wide range of light and dark tones to create depth and dimension. By learning how to manipulate light and shadow, the artist can create a painting with high contrast.
What’s more, by limiting a colour palette to the tonal values of one hue, you have the ability to express atmosphere, mood, or emotion by taping into the power of colour psychology.
Cool, right? So, how do you start a monochromatic painting?
Keep reading to discover the easy step-by-step process of painting a monochrome watercolour painting with precision and ease!
DISCLOSURE: This page contains affiliate links. If you make a qualified purchase using any of the links, I’ll earn a small commission at no extra cost to you. I appreciate every sale because it allows me to create free content to promote the growth of this website.
Table of Contents
What is Monochrome Art?
Monochrome art is a unique art style because it can be applied to all art mediums including painting, drawing, digital illustrations, portraits, and so forth.
Monochrome art uses only one colour to convey an atmosphere, mood, emotion, or meaning. In this way, monochromatic artwork incorporates various shades and tones of a single hue to create visual interest and variation.
The benefits of creating monochrome art are many, such as:
- It helps you understand tonal values. By using a range of tonal values—ranging from very light to very dark—you learn how to create contrast
- It helps you learn about light and shadow. Developing this skill will help you create depth and dimension in your artwork
- It helps you understand the full range of your chosen colour. By creating value scales for each hue, you learn about that colour’s spectrum of tonal variety
Materials You Will Need
This easy monochromatic watercolour tutorial uses similar art supplies to regular watercolour paintings.
However, the key difference is that only one pigment is being used. I’m using cerulean blue in this demonstration, so pick a blue pigment from your palette that is similar to this hue
Now, let me share with you my list of recommended watercolour supplies for this tutorial:
- Watercolour paints (I’m using White Nights Watercolour Paints)
- Watercolour brushes (I’m using Silver Black Velvet Brushes)
- Watercolour paper (I’m using Arches Cold-Pressed Paper)
- Mixing palette (I’m using Meeden Porcelain Mixing Palette)
- Masking tape (I’m using Pro Artist Tape)
- Heat tool/gun (I’m using Mlife Mini Heat Gun)
- White ink (I’m using Winsor & Newton White Ink)
- 2 jars of water
Related: Check out this article if you’re interested in a detailed list of watercolour supplies and recommendations.
Create A Value Scale to Study Gradients
Before you begin, it’s important to understand that a monochromatic painting is created by contrasting different tonal values.
So, first thing’s first: you need to practice creating a value scale for the colour you have chosen. This step is important because it offers excellent advice for beginner watercolour painters.
Essentially, you should create a value scale to study the tonal variety of your pigment. Doing so will reveal that colour’s lightest to darkest tones.
To warm up, you should create a gradient to study your pigment’s values. You can accomplish this by doing the following:
- Draw a rectangle and divide it into 6 sections
- Add water to your pigment to dilute it until it looks light and pale
- Create a nice and even flat wash horizontally across your page, starting at the second box (keep the first box white)
- Wait for the paint to dry
- Add a little more pigment to your mixing well, and then paint the second layer starting at the third box
- Again, wait for the paint to dry
- Repeat steps 5 and 6 until every rectangle is filled with paint. Each one should get darker as you move across the scale
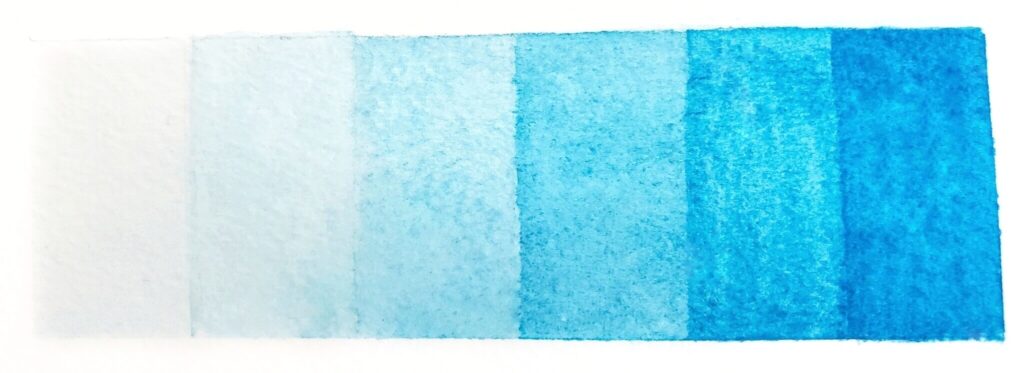
Voilà! You’ve completed your gradient study.
On the left side, the value will be the lightest. And on the right side, the value will be the darkest.
You can use this reference as a guide for this monochrome panting tutorial. It will help you understand whether you need to add more water to lighten the colour, or add more pigment to darken it.
Related: If you struggle with controlling water, check out this article about mastering the paint to water ratio.
Monochrome Watercolour Painting Tutorial for Beginners
1. Set Up Your Painting and Workspace
To begin, you need to use your painter’s tape to tape down all 4 sides of your watercolour paper. Doing so ensures that the paper does not warp or buckle while you’re painting on it.
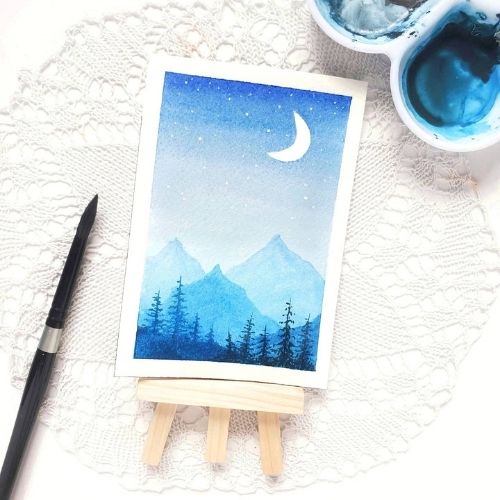
Secondly, use your tape or masking fluid to section off a part of the sky where the moon will be. In this watercolour tutorial, I’ve decided to create a crescent moon.
Now comes the fun part!
It’s time to create a monochrome painting by learning how to paint skillfully with watercolours using a single hue.
2. Paint the Background Layers First
To complete this second step, follow these instructions:
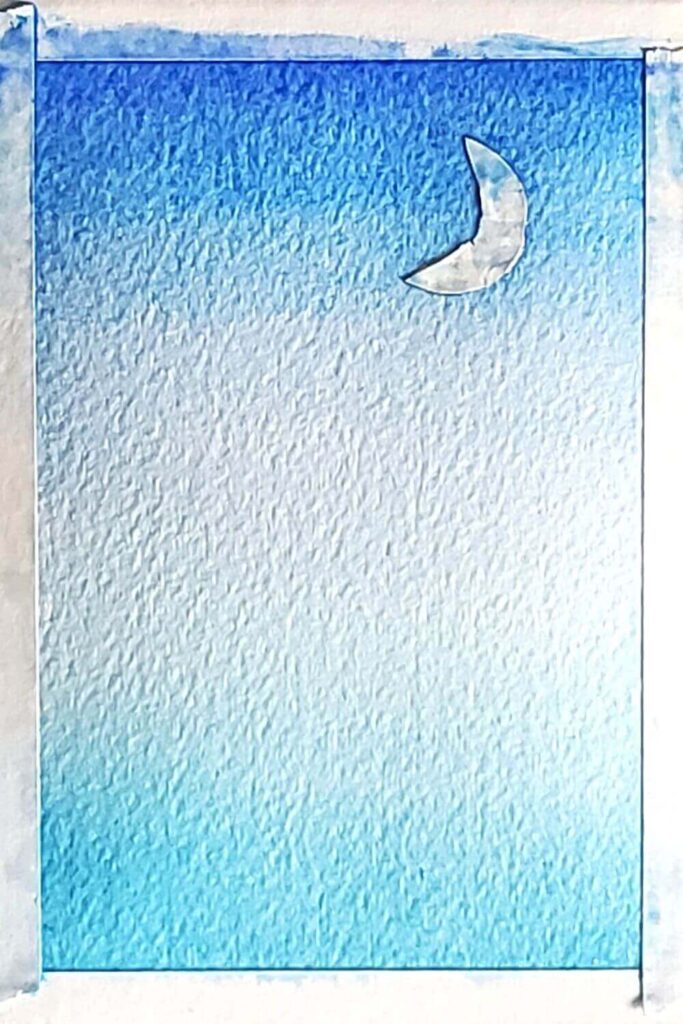
- Add a bit of water to your pigment and mix it in the mixing well. The colour should be dark, but not too dark
- Starting at the top of the painting, use the wet on dry watercolour technique to slowly transition down the page from a darker colour on top to a lighter colour at the bottom. The goal is to create a smooth gradient. Wait for the layer to dry
- Repeat step 2 because you want to darken the overall values. A second pass also allows you to smoothen out the gradient in case it wasn’t seamless the first time around. Wait for the paper to dry
3. Paint Several Background Mountain Layers
In this section, you’ll be painting a series of mountains. Here are a few tips you should keep in mind:
- Objects farther away in the background will appear lighter
- Objects closer in the foreground will appear darker
- To make mountains looks organic, vary their heights by painting random lines horizontally across the page
Now that you understand a few basic compositional tips, it’s time to paint the mountains. To accomplish this, you must:
- Add more pigment to your mixing well to darken the pigment. It should be a little darker than the middle of the background
- Paint the first layer of mountains by varying the height of the mountain peaks. Essentially, you’re painting the silhouette of the mountain using the wet on dry technique. Wait for the layer to dry
- Repeat steps 1 and 2 three more times until you have a gradient of tall light mountains in the background and smaller dark mountains in the foreground. With every layer, you add a little more pigment to the mixing well to darken the tonal value. After each layer, wait for the paint to dry
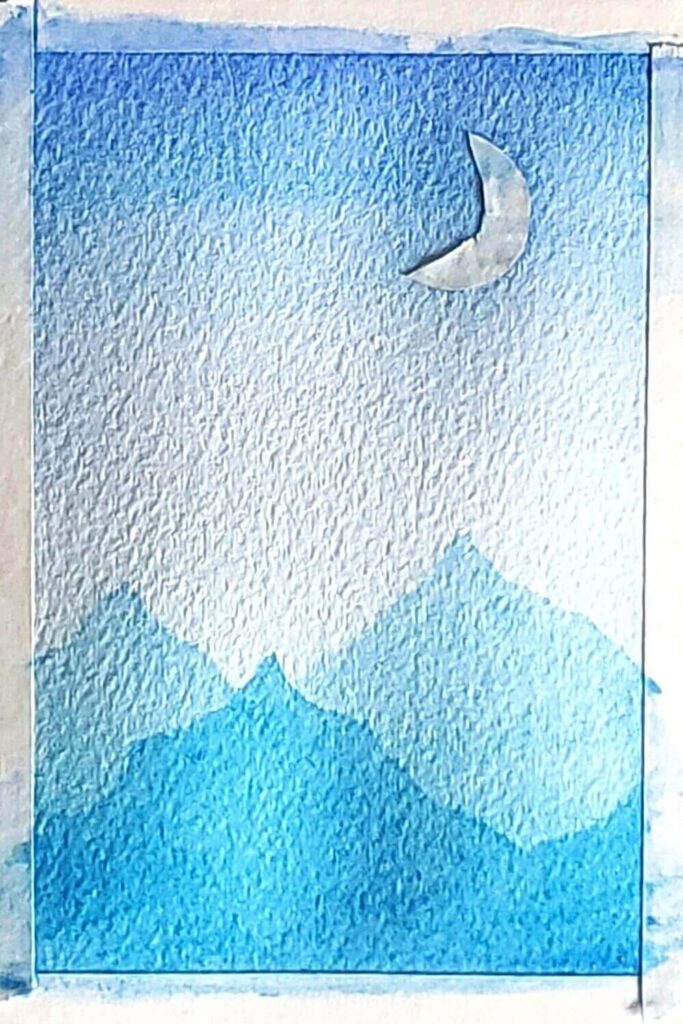
Note: It’s important that you always wait for each layer to dry. Otherwise, you are likely to smudge the paint and the diversity of values will be lost.
4. Paint the Sloping Hills in the Foreground
In this section, you’ll be painting 2 layers of sloping hills; one of the right and one on the left. Here are a few tips to keep in mind:
- Objects closer in the foreground will appear darker
- Vary the height of the slopes to make them look organic
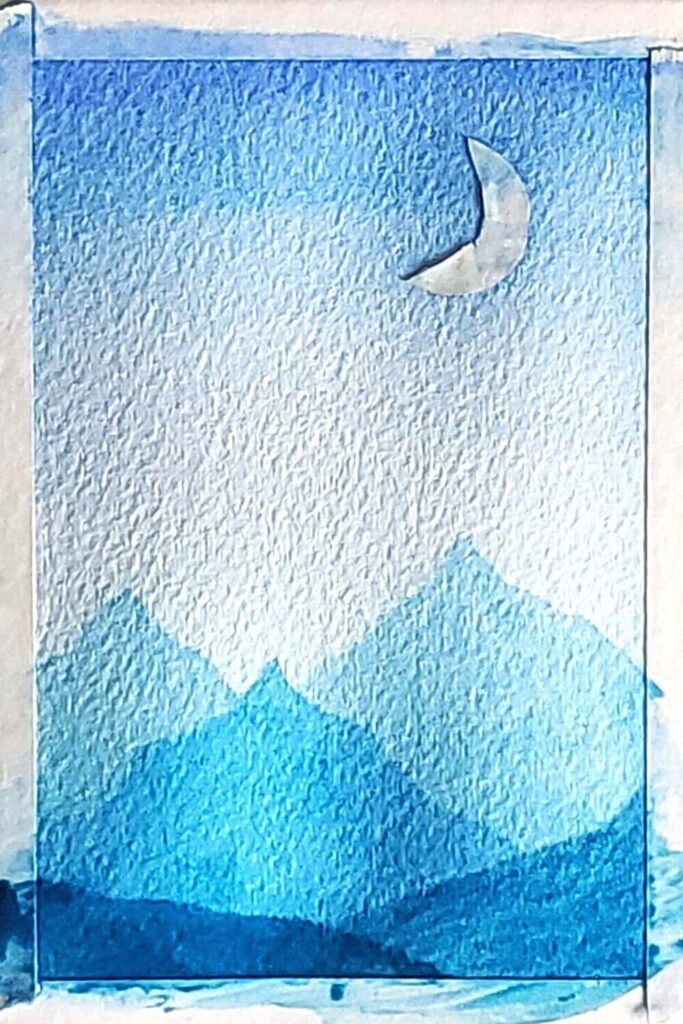
Remember, the slopes are going to be darker than the mountain layers. This will push their forms to the foreground while creating more depth in the entire landscape. Here’s what you need to do next:
- Add more pigment to your mixing well so that the paint is fairly dark
- Paint 1 slope on the right side of the painting and wait for it to dry
- Darken the pigment a little more and then paint the second slope on the left side of the painting. Wait for it to dry
5. Paint the Pine Tress
You’re nearly done with the landscape!
Now, all you have left to do is to paint some little trees in the foreground. The first layer of trees will be the same tone as the left slope, so here’s what to do:
- Draw a few thin vertical lines of varying heights. These will be the trunks of your trees
- Using your paintbrush, drag the bristles across the vertical line in a zig-zag manner. The strokes should be thinner and sparser at the top, and then thicker and more clumped near the bottom
- Paint as many trees as you like and then let them dry
- To finish off, add one last layer of trees in the foreground. These trees will be the darkest tones in the entire monochrome painting. Once you’ve finished this task, wait for the painting to dry
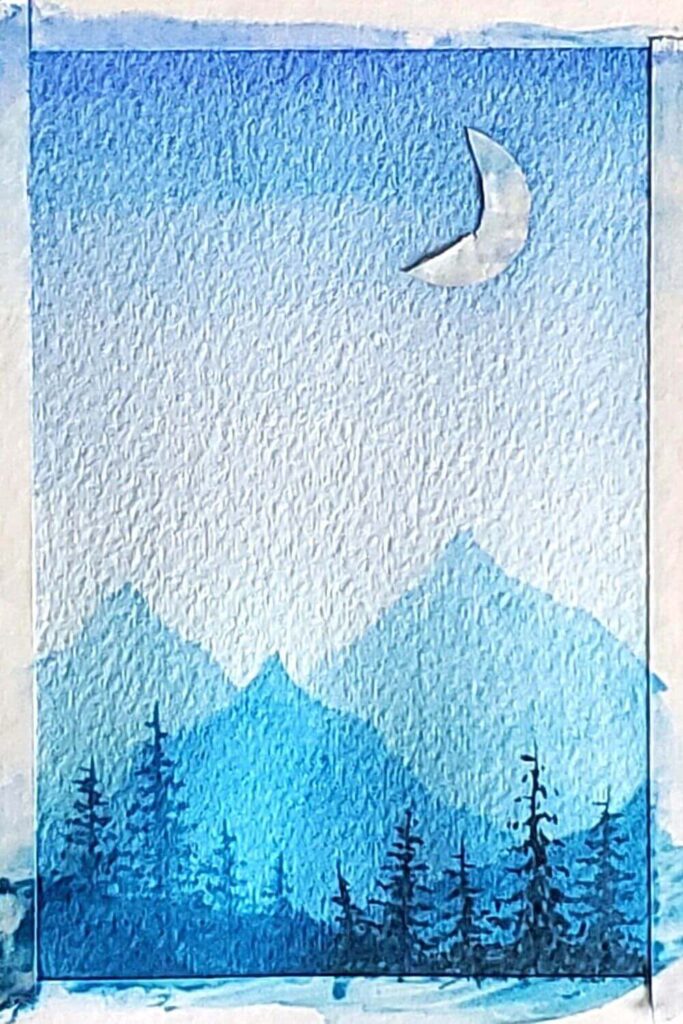
Note: If, by chance, your blue isn’t dark enough, add just a tiny bit of orange to your pigment. Mixing complimentary colours darkens the pigment.
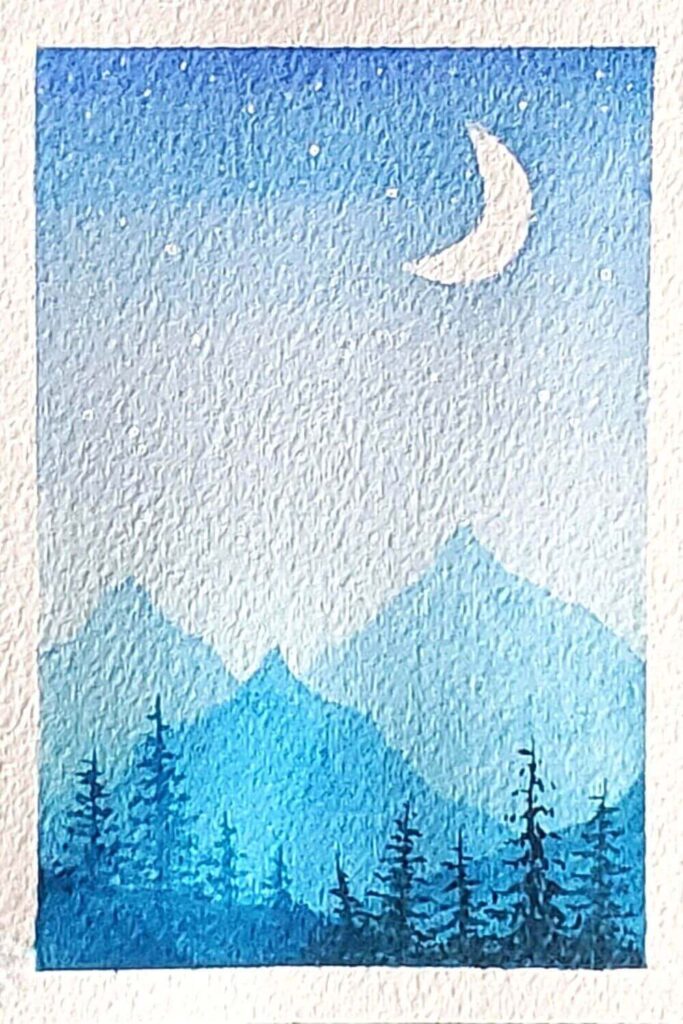
6. Splatter the Stars
Now it’s time to add the final touch: the little sparkling stars!
All you have to do is use this clever watercolour hack:
- Dilute white watercolour paint or white gouache in your mixing well. The consistency should be somewhat wet, but not too watery
- Using your brushes, gently tap one against the loaded paint brush and watch as the tiny dots splatter across the painting. Be careful because you don’t want droplets of water to fall onto the painting
- Use the splattering technique to spatter as many stars as you’d like. Load up your brush again if you run out of pigment
Note: For extra flair, you use your paintbrush to make a few of the stars bigger or you can add a shooting star. This will add more visual interest to the sky.
7. Peel Off the Tape
Now it’s time for one of the most satisfying parts of watercolour painting: peeling off the tape.
There’s a right and a wrong way to peel the tape off. If you want crisp white edges without paper tears, then follow this advice:
- Gently peel the tape off at an angle because the pressure will be less likely to tear at the paper
- Take off one piece of tape at a time and do so slowly
- Peel the tape off of the moon or use your finger to scrub away at the masking fluid
Hurray! Your blue monochromatic landscape painting is all done!
Conclusion
There you have it: an easy monochrome painting tutorial that was designed for beginners!
It’s a good idea to create monochrome paintings from time to time because these types of paintings help you better understand the range of values that a single pigment can produce.
Now that you’re familiar with the basics of paintings that only use one colour, you’re ready to dive deeper into the wonderful world of monochromatic artwork.
Luckily for you, I’ve created the perfect monochrome watercolour course that’s beginner-friendly and engaging. Click on the image below for more details!
Miranda Balogh
Artist & Online Educator




I’ve seen a lot of artwork of this nature, and I think they look amazing. Love that you went through the process step by step. Seems like a fun kids activity. Thanks for sharing
Thank you! Yes, monochrome paintings are definitely kid-friendly. So it’s an activity worth exploring if you have kids!
I have been wanting to try this for the longest time! I have a canvas ready too and now with these awesome tips Im.gonna give it a try! Super excited!
If your canvas is ready, then I highly encourage you to give this monochrome painting a try when you have some free time. I’m sure you’ll enjoy it!
So cool! I am not good with anything artistic but this is super helpful!
I appreciate that you took the time to read this article and leave a comment. Thank you!
I think monochromatic pieces are very relaxing (if that makes sense), I’m a big fan of things not looking “busy,” so these types of pieces are perfect! PS – love the technique you use to do the stars, so clever!
Yes, I agree that monochromatic artwork can look very calm and soothing because tonal values are great at evoking moods. So I’m glad you liked this watercolour tutorial!
Wow, this looks so good! and the steps seem pretty easy to follow! Might try it when I need to relax and take my mind off things! Thanks!
You’re welcome! If you decide to follow this monochrome watercolour tutorial, make sure to tag me so I can see how your piece turns out!
I might just try this fun project this weekend. Thanks for breaking it down into easy steps that a non-artist can follow.
Good luck with the painting. When you complete it, tag me @mirandabalogh.art on Instagram so that I can see the final outcome and share it!
You are extremely talented. I never would have realized this was a monochrome painting had I not seen it step by step. I can’t wait to try it with my son.
Thank you very much! I appreciate your kind comment.
I love how detailed this article is. The step by step process described was very helpful.
I’m glad you found this monochrome watercolour tutorial helpful!
Great ideas! Thank you. I used to paint a lot and have not touched a paintbrush in years. With your easy tutorial, I am ready to go back to it and have fun. Love to replicate your design, which is quite beautiful and peaceful.
Picking up the paintbrush again after many years sounds exciting! I wish you the best of luck with your new paintings.
This is so cool. I’m haven’t painted in a little bit but I like to try painting again. This is such a detailed and easy to follow tutorial. This is great
Thank you! Taking breaks is sometimes necessary to recharge our creative batteries. After a break, I find picking up the paintbrush again feels so much more exciting. Thanks for sharing your thoughts!
Wow, what gorgeous artwork! Love it
Thank you very much! I really appreciate your support.
This is so helpful especially to those artists who are still learning to get better in arts! I’m not really that artistic kind of person but I do love appreaciating arts like this! Thanks for this!
My goal is to help artists of all levels improve their watercolour paintings, so I’m happy to know that you found this tutorial helpful!
Thank you for the post.
I love that you walked us through each step.
I absolutely love monochrome art because you can make so much depth to the piece with only “one color.” As you said, that is the point.
I also love that you can make the same painting and the emotion changes based on the color you use.
Good points! It’s amazing how changing the colour of a monochrome painting can change the entire mood or atmosphere of an artwork. Thanks for sharing your thoughts!
This is such a cool idea. I would love to be able to paint but watercolors are so intimidating for me. Maybe if I kept it to a monochromatic color scheme then it would be much easier. Thanks for the helpful suggestions!
~ Andrea
That sounds like a great idea! By focusing a monochromatic painting, you’ll eliminate the parts of watercolour painting that might seem intimidating, such as colour theory and colour harmony.
Miranda,
It is midnight here in Florida, I can’t sleep as I am recovering from surgery for two fractures on my leg. I am excited to get back to my painting and will definitely try the monochrome painting. I am 84 years young…..but I do fabric art and painting. As it takes awhile for me to get moving I spend a lot of time reading,quilting, fabric art and heirloom christening gowns. I love to create and am so happy to have found your blog. I look forward to learnIng new things. We have all had a tough go with this vivid. Staying home can give one peace of mind
I look forward to more good things.
From you.
Thank you for sharing your story! I’m glad that you enjoy learning new things from reading my blog. Much appreciated!
Miranda I really enjoyed you thorough explanation of how to paint with monochrome. I do like your videos but I am a better reader and can take my time to follow your directions. As always, thank you for being such a wonderful teacher.
Hi Thomas!
Thank you very much! I appreciate your comment.
You’re a wonderful student. Keep up the good work!